
Introduction
Since I have been working with VMware Cloud Foundation for a while, and I have already carried out several PoCs for my customers, I have been looking for a while for a way to run Cloud Foundation in my home lab in order to be able to advise my customers comprehensively on complex detailed questions.
Unfortunately, the hardware requirements for Cloud Foundation are very high, so I quickly discarded the idea of more hardware in my lab. I had the idea to map the whole thing “Nested”. When I heard about the “Holodeck” project at the beginning of this year, I thought that would fit like a glove, so I started to roll it out in my lab.
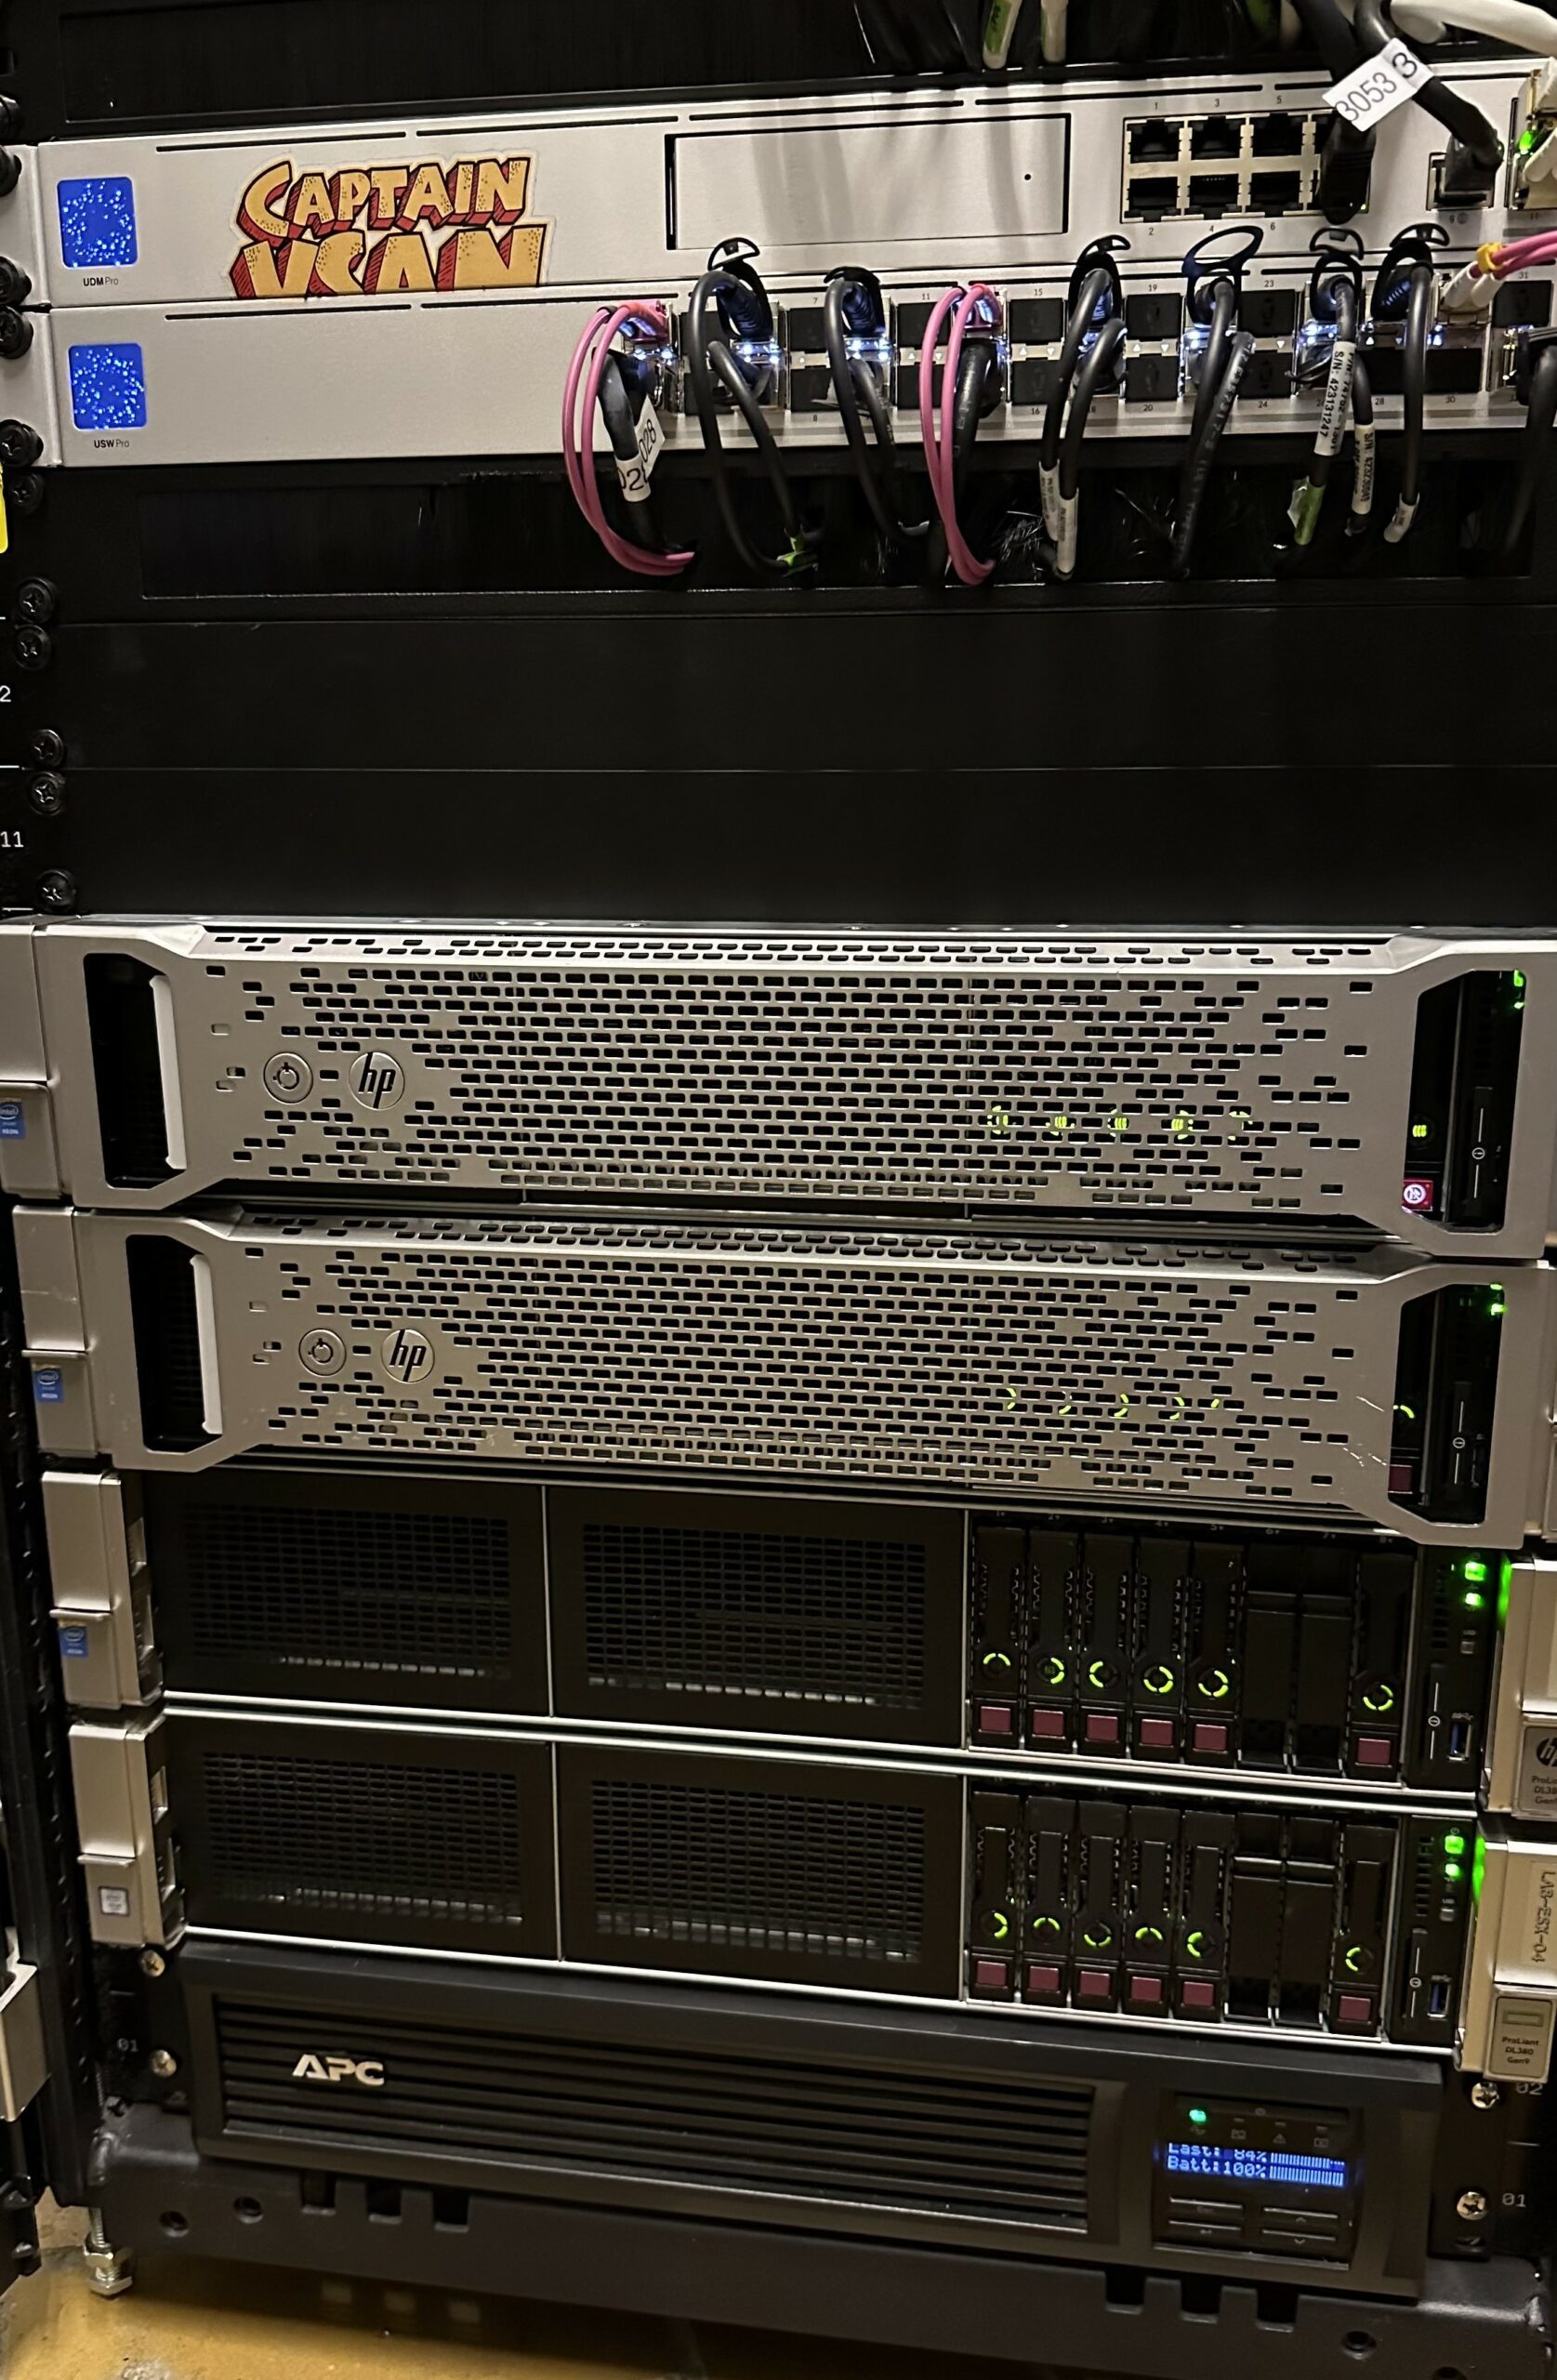
As I’m sure one or two readers of my blog know, my current Homelab consists of three DL380 GEN9 servers, each with 384GB of RAM and two 14-core Intel CPUs. For storage, I use vSAN with NvME Cache Devices & SAS SSD Capacity. The usable storage space is ~ 13TB.
From my point of view, this hardware should be sufficient to run VCF Holodeck. And so I started my first attempts with the Holodeck deployment at the beginning of this year.
Unfortunately, I quickly realized Holodeck’s automation was tailored to the “standalone ESXi” requirement I also described, so I had no chance to install Holodeck on an ESXi host that was in my vSphere cluster.
After some tests & adjustments e.g. Fake SCIS Reservation on vSAN, taking a host out of my “production” Homelab cluster I managed to install Holodeck. So far so good, unfortunately, I lacked resources in my Homelab cluster & I didn’t want to “spend” a whole host just for Holodeck. Therefore my Holodeck deployment only lasted for a short time and I rolled everything back again.
If you’ve read this far and are wondering what this guy wants from me, first of all, thank you very much!
I have not given up at that point of course only I still needed some time to realign the architecture of my Homelabs accordingly ;).
As luck would have it, I found something much better while looking for more RAM for my lab – who doesn’t know it?
Hardware
I actually got an offer for a complete DL380 GEN9 host that I couldn’t refuse – because the host was almost perfectly equipped for the holodeck deployment.
512GB RAM, two Xeon CPUs with 12 cores each, and two dual-port 10 Gbit Ethernet cards, and that for a price you normally don’t even get 265GB RAM from colleagues. Storage space was also quickly taken care of, because thanks to eBay, there are now 7x 3.84TB SAS SSDs in the server.
Again very briefly back to the beginning when I said “not more hardware for my lab for VCF holodeck” the summary is – okay, not all plans work out 😉
Therefore perfect conditions for the installation of Holodeck 2.0 which I will describe in the following.
What is Holodeck?
If you’re still wondering what Holodeck and Cloud Foundation actually are, here’s a good explanation straight from VMware: https://core.vmware.com/resource/holo-toolkit-20-overview

but now let’s start the engines aka. server and install Holodeck.
Installation of Holodeck 2.0
In the first step you have to get the holodeck resources and a look into the really good documentation of VMware surely doesn’t hurt either.
https://core.vmware.com/cloud-foundation-holodeck-20-setup
https://via.vmw.com/holodeck-20
Custom ISO for Holo-Console
If you have the binaries for Holodeck you have to build a Custom-ISO for your later Holo-Console.
This process is also very well documented:
https://core.vmware.com/resource/holo-toolkit-20-download-software-and-create-custom-iso?path=/cloud-foundation-holodeck-20-setup#prerequisites
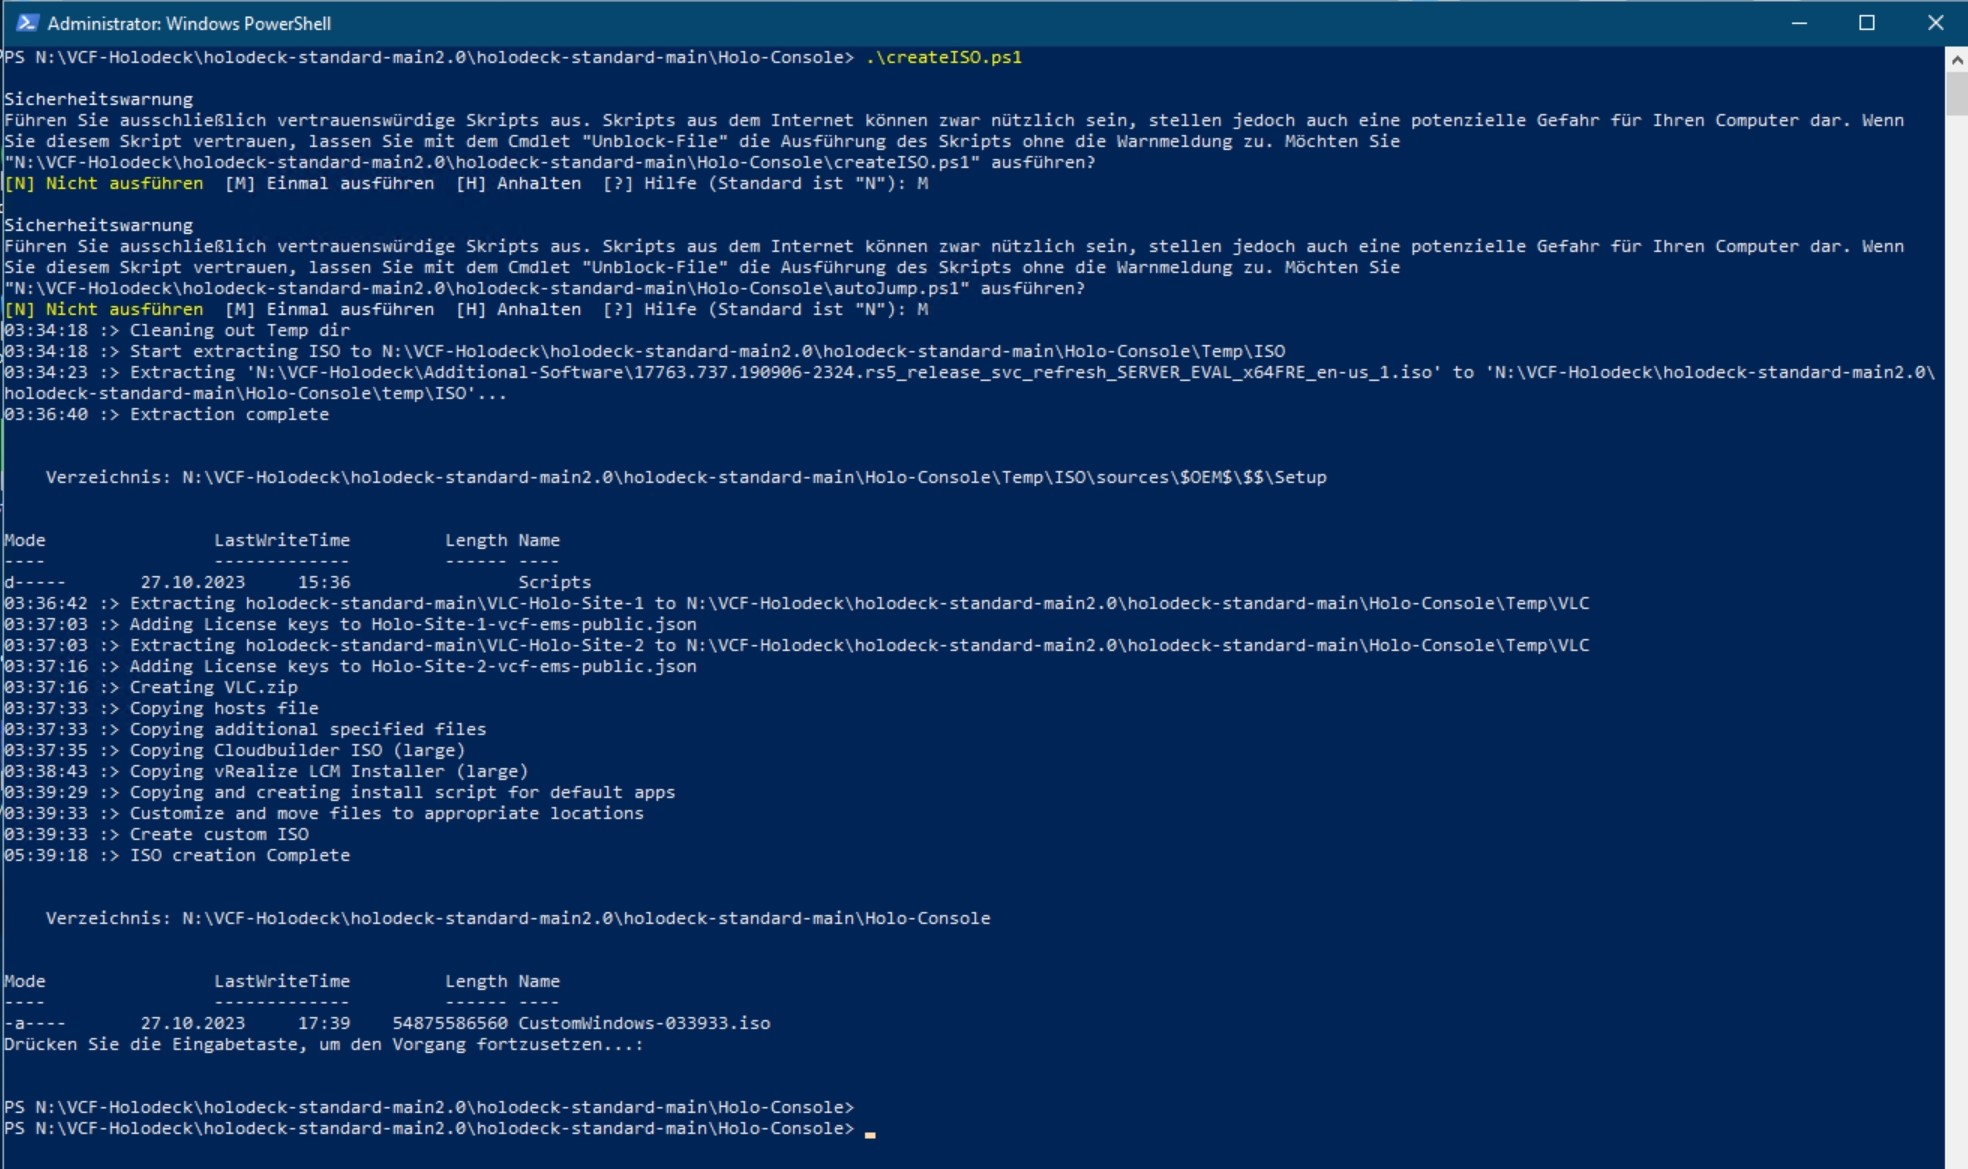
After the custom ISO has been created, install your Holo-Console.
Here you create a Windows 2019 Server VM following the usual steps:
https://core.vmware.com/resource/holo-toolkit-20-deploy-console?path=/cloud-foundation-holodeck-20-setup#holodeck-holo-console-deployment
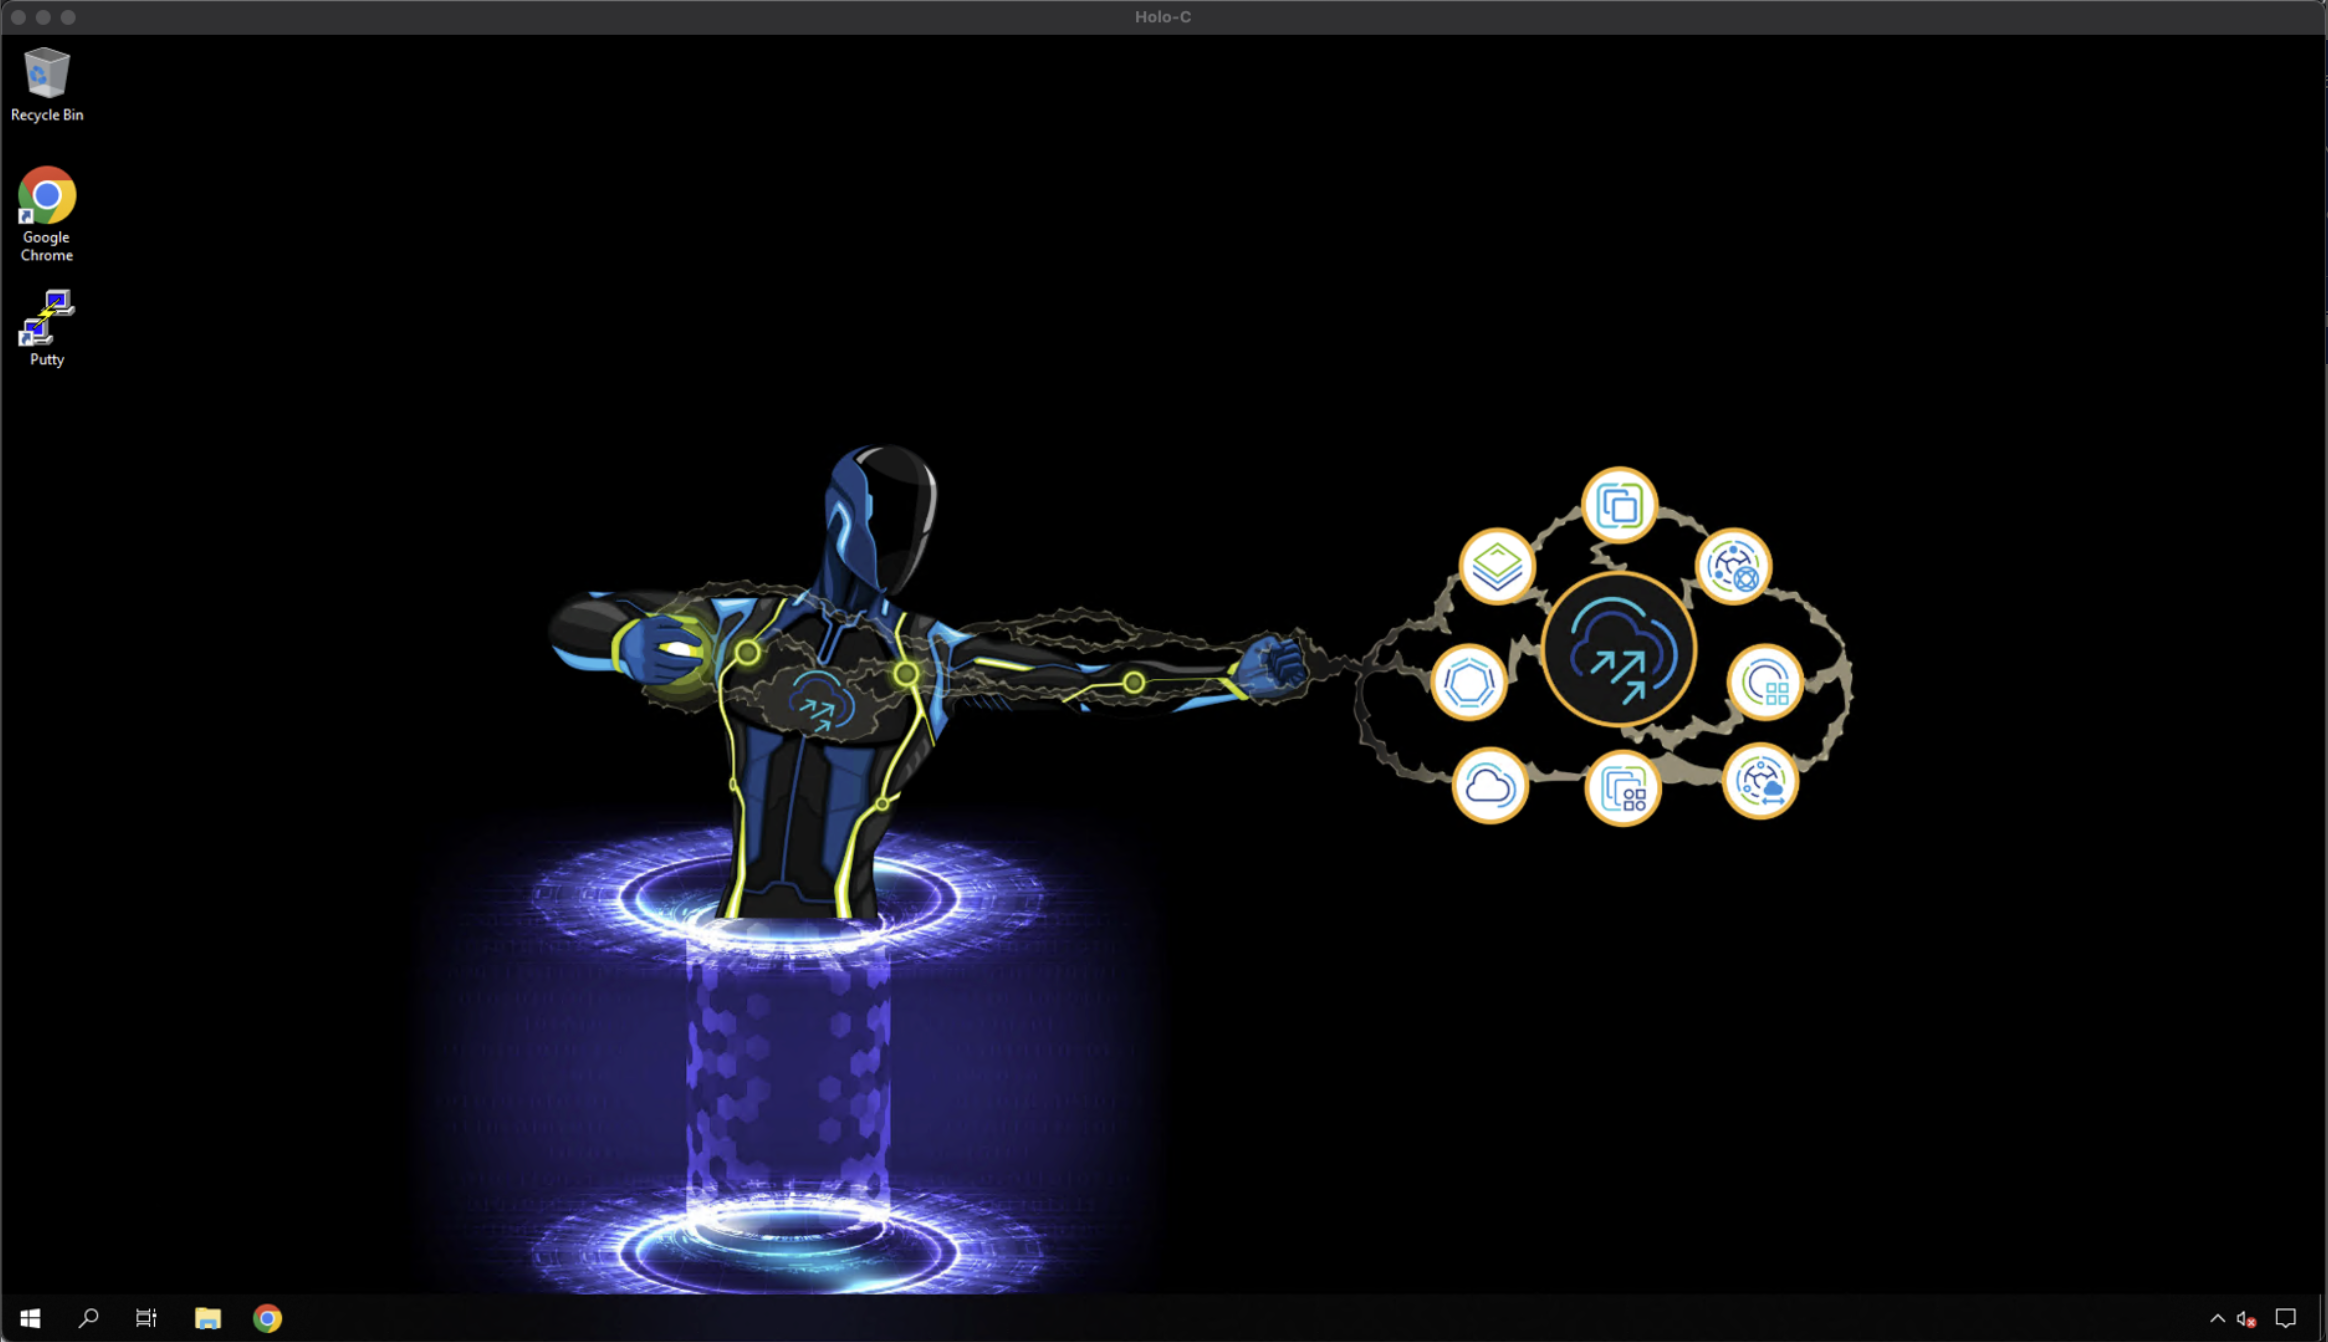
This is what your Holo-Console should look like if the installation was successful.
ESXi Preparation
Next, we take care of the ESXi host we want to use for VCF Holodeck here vSpehre standard switches have to be configured. In addition, the host must of course be up & running and accessible from your management network. Please the steps given in the documentation:
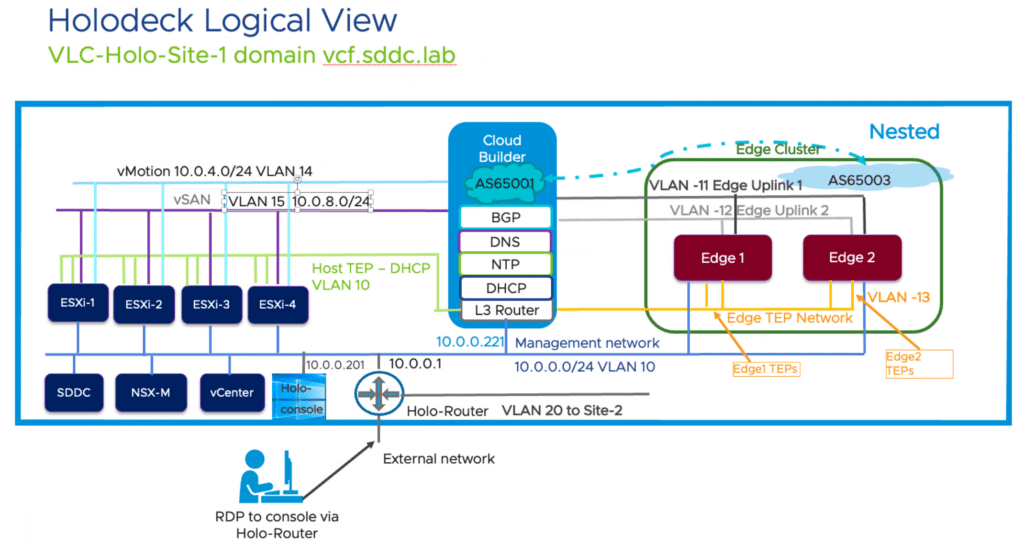
Holo-Router
Since the Holo environment will run on a completely separate and isolated network or vSphere standard switch on your dedicated ESXi host (compare the requirements for Holodeck), the next thing you need is a router to reach this network. This router is included in the Holodeck binaries as a ready-made appliance – you just need to roll it out.
https://core.vmware.com/resource/holo-toolkit-20-deploy-router?path=/cloud-foundation-holodeck-20-setup
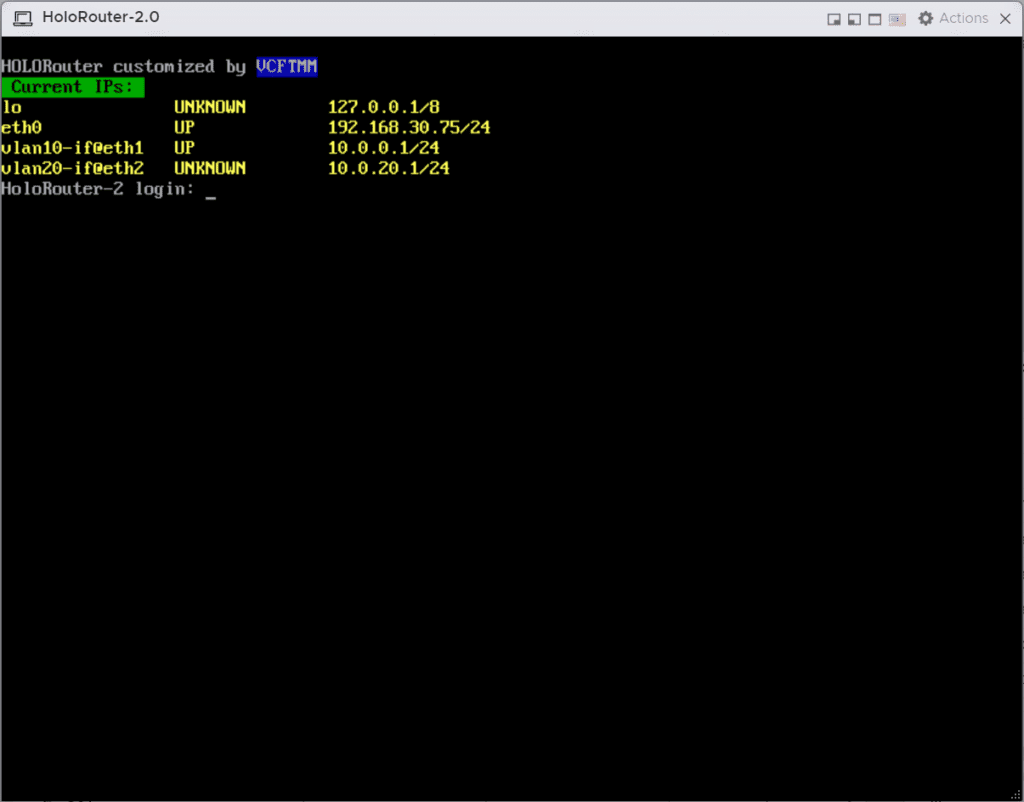
This is what it looks like when the roll-out has been successful.
Once the network setup is in place, we can comfortably access the Holo-Console via RDP and then perform the next steps for deploying the Holodeck VMware Cloud Foundation from there.
In my case the RDP IP address is 192.168.30.75 -> this will surely be different for you. Hint: You have set it during the roll-out of your router.
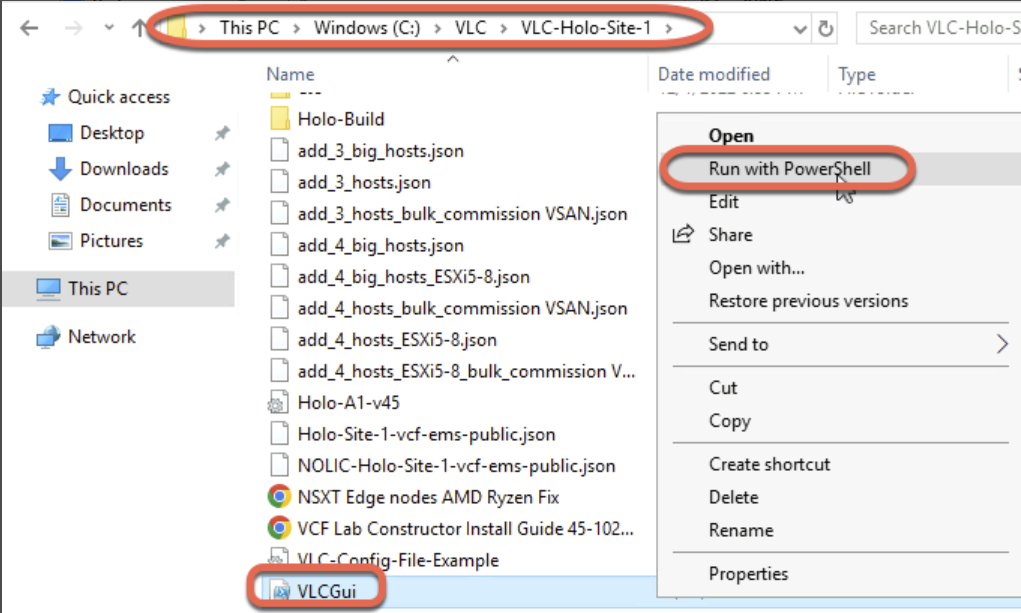
Automated Bringup of VCF Holodeck 2.0
Next, we really get going, we can start with the automated bring up of Cloud Foundation.
You can find the exact process in the documentation:
https://core.vmware.com/resource/holo-toolkit-20-deploy-vcf-vlc-gui?path=/cloud-foundation-holodeck-20-setup#deploy-vcf-with-vlc-gui
Special Adjustments in my Case (legacy / unsupported CPU ESXi 8.x)
at this point a tip from me, because ESXi 8.0 reports my Intel® Xeon® E5-2690 v3 CPU as legacy and unsupported I had to adjust a small thing in the automation (VLCGui.ps1), because as you probably know an installation of ESXi 8.x on legacy and unsupported CPUs is possible, but must be confirmed. And that’s what I had to teach the automation as well.
Row 3645 in VLCGui.ps must be adjusted:
$kscfg+="install --firstdisk --novmfsondisk --ignoreprereqwarnings --ignoreprereqerrors --forceunsupportedinstall`n"
As you can see I added the parameters: –ignoreprereqwarnings –ignoreprereqerrors –forceunsupportedinstall
Without these Parameters, automation will fail for ESXi 8.0 with unsupported CPUs.
So finally we can start the automation 🙂
Start of automation
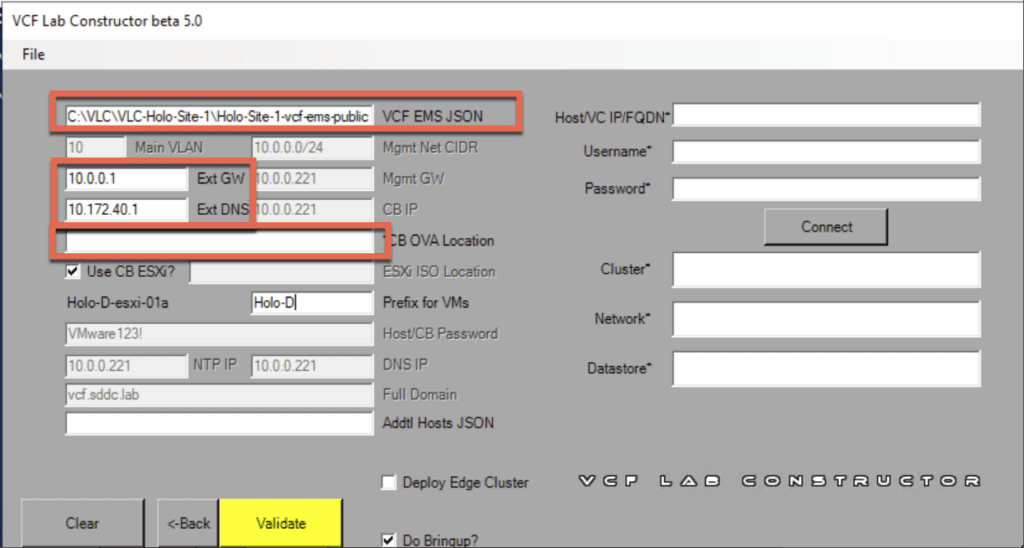
When you’ve completed all fields for deployment you can “Validate” your Inputs with the yellow button.
And after that when all validation is good you can “Contruct” with the green button your nested Holodeck VMware Cloud Foundation environment.
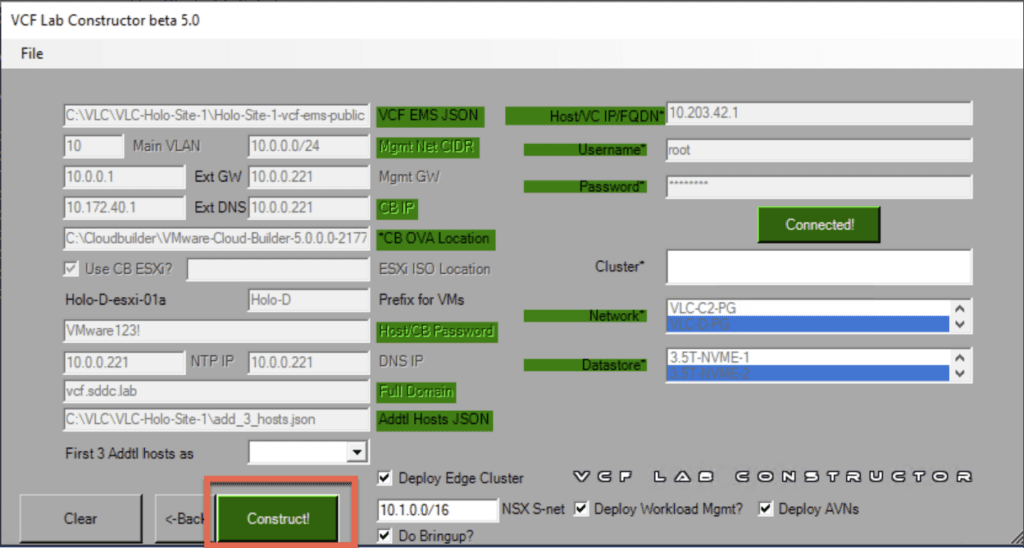
and then the magic begins -> fully automated installation of VMware Cloud Foundation:
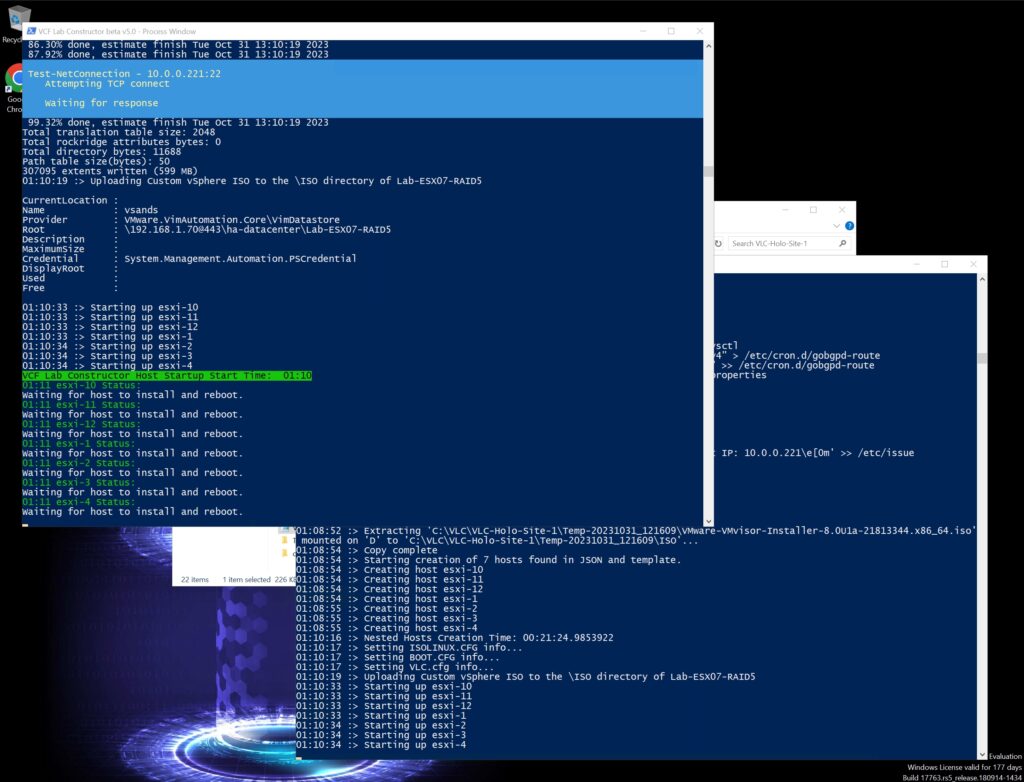
this bring-up script will take a while to hours depending on the underlying hardware you use. In my case, it took several hours.
Maybe worth mentioning when you are getting stuck in automation or experiencing problems before you can start the automation there is a slack channel where you can get in touch directly with VMware employees building this holodeck. http://tiny.cc/getVLCSlack
3 hours & 36 minutes later…
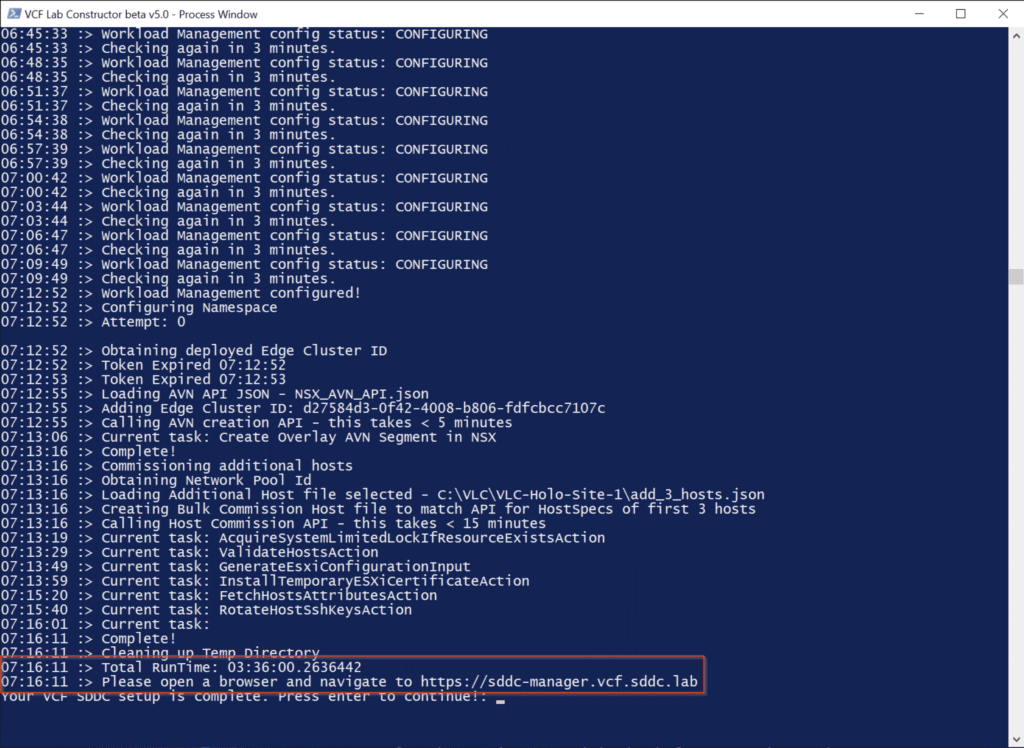
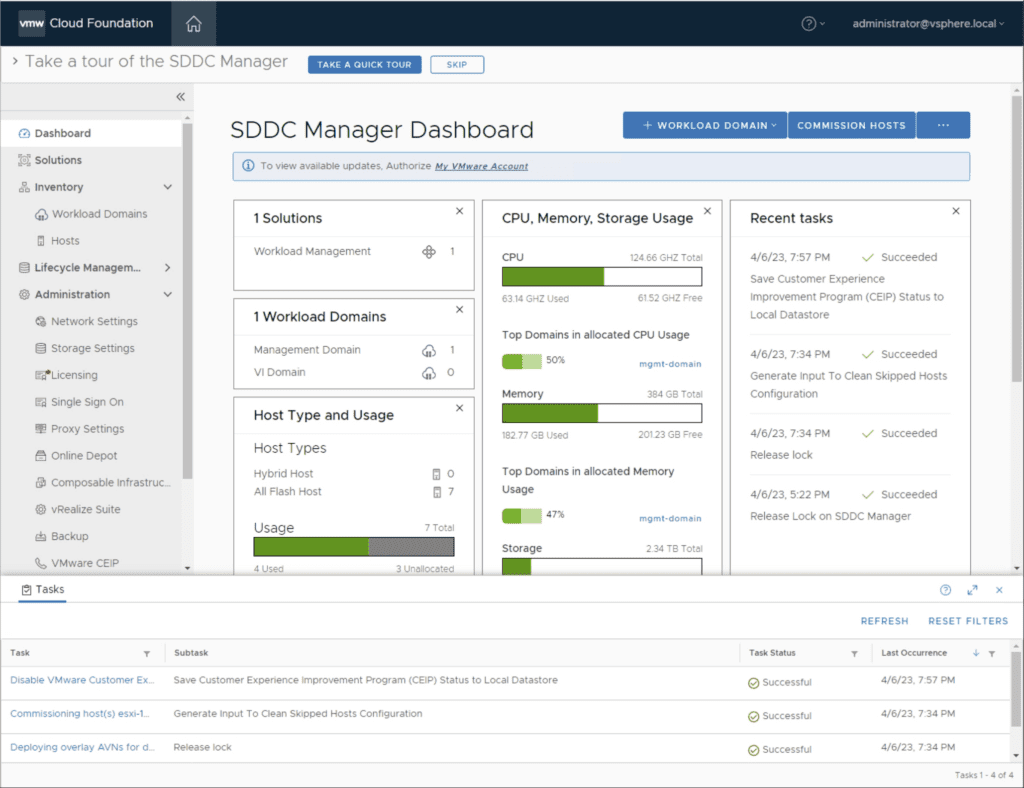
my VMware Cloud Foundation environment is up and running 🙂
Conclusion
Since holodeck is intended to be used in a reproducible environment, e.g. for demos or to collect hands-on experience, some things have to be installed or configured in the VCF environment. This I will show you in another blog post to come to an end here.
If you have further questions or feedback, feel free to comment below this post or send me a message directly via the contact function.
2 Responses
Hi there,
I have question cause a repeatedly stuck at deployment of NSX Edge Cluster at validation of prerequesities and I would like to join that Slack Channel that you mention, but Im totally lost at point where to get an invitation.
Please do you have some suggestions where to get the invitation?
Thanks for this article and your answear.
Hi, thnaks a lot for your comment. Sadly that mentioned Slack Channel did not exist any longer. It was teard town with the Broadcom merger.
So may there is another place where your answer could be answered but I don’t know yet.
What is your exact problem you faced?