Actually, I have been running NSX(-T) in my home lab since late 2020 and also updated accordingly to the last available version. Unfortunately, at the beginning of November 2022, with the release of vSphere8 with VSAN 8, I got the glorious idea to try out VSAN ESA in my lab. It came as it had to come….Spoiler: You should only do ESA on an „All NVME“ environment, preferably when all devices are on the HCL as well.
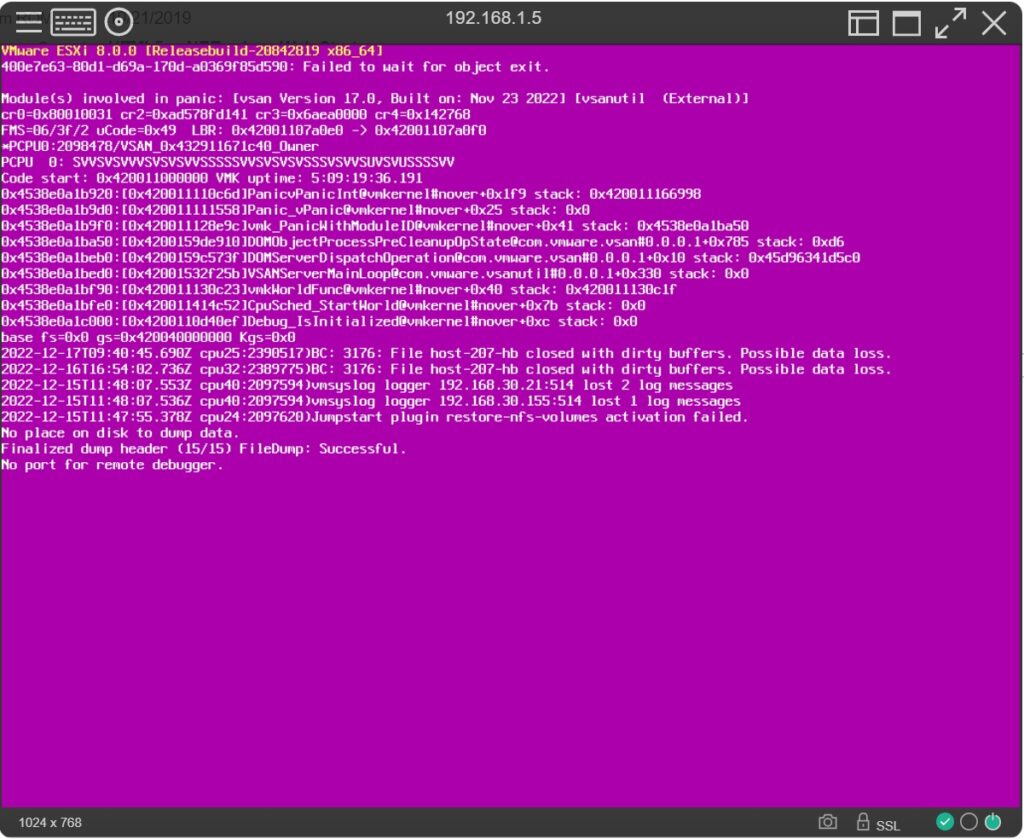
After about 2 months I, unfortunately, had a BSOD on one ESXi host exactly at the time when another ESXi host came back from maintenance mode. Since I had 2 out of 3 hosts out of the vSAN at that time, the vSAN of course stopped working and several VMs went to the eternal hunting grounds. So unfortunately also my 3 NSX managers.
Since I had a backup of the NSX Managers, I thought – no problem, now I have a reason to restore the NSX Managers from the file-based backup I had set up in the NSX Managers.
So far so good, so I rolled out the new NSX Manager appliance and reconfigured access to my backup share, and pressed the restore button in anticipation. Then Booom -> Internal Server Error during the restore 🙁
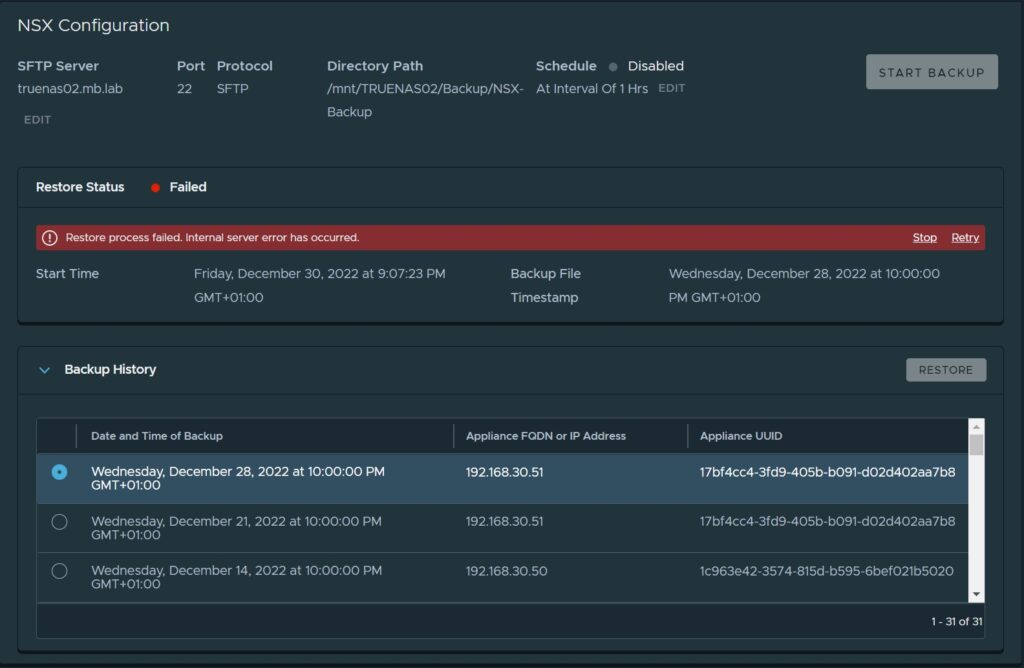
Since I can’t open any support tickets from my lab environment and there is hardly any information documented on the internet about errors during the restore of NSX Managers, it will, unfortunately, remain a mystery for me for the foreseeable future why I can’t restore my backup.
Therefore, I had only one option – rebuild my NSX environment, which I have documented here for you & I want to show you accordingly.
1. Roll out the NSX appliance according to your appropriate needs (DNS name, IP address, etc.).
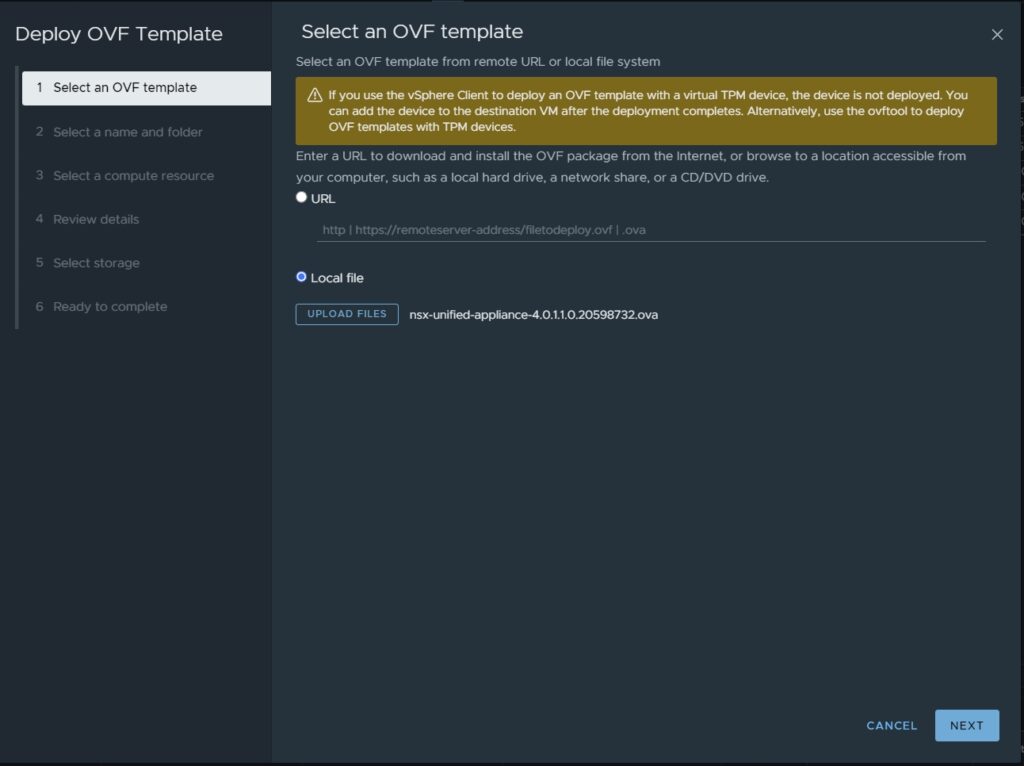
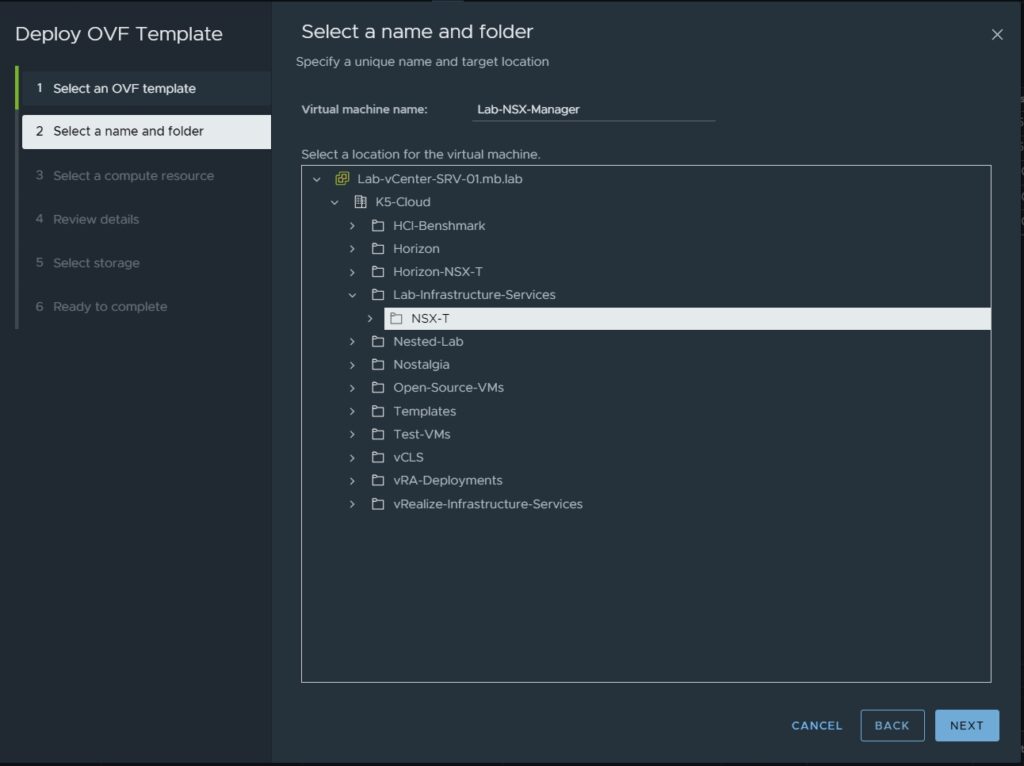
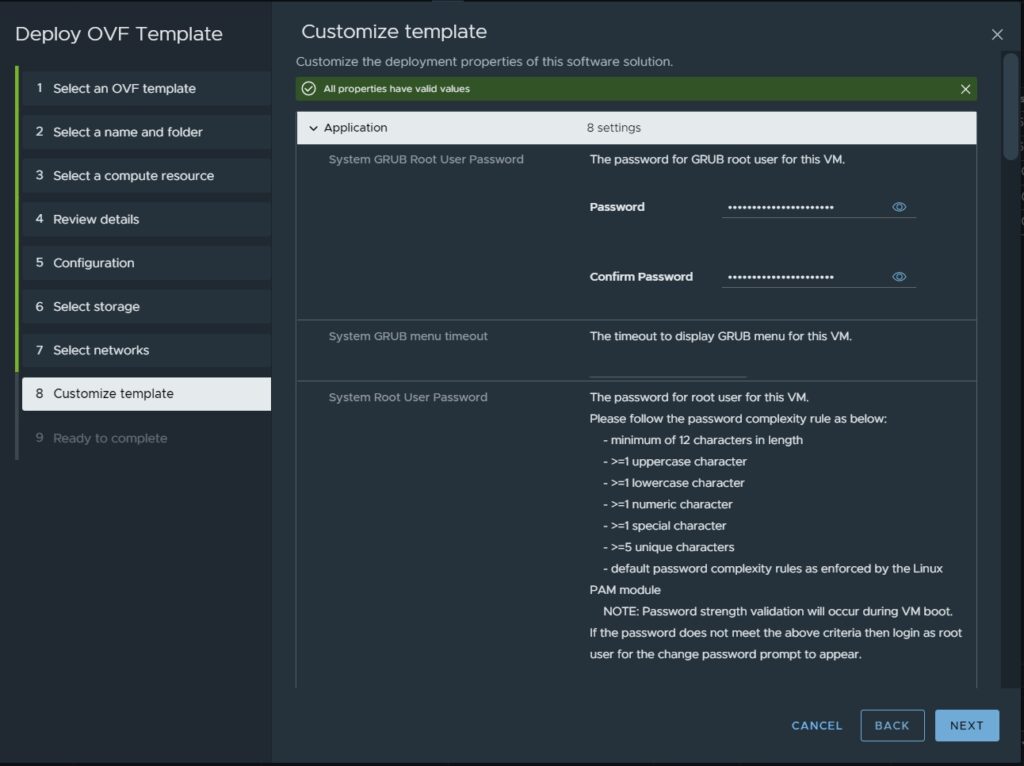
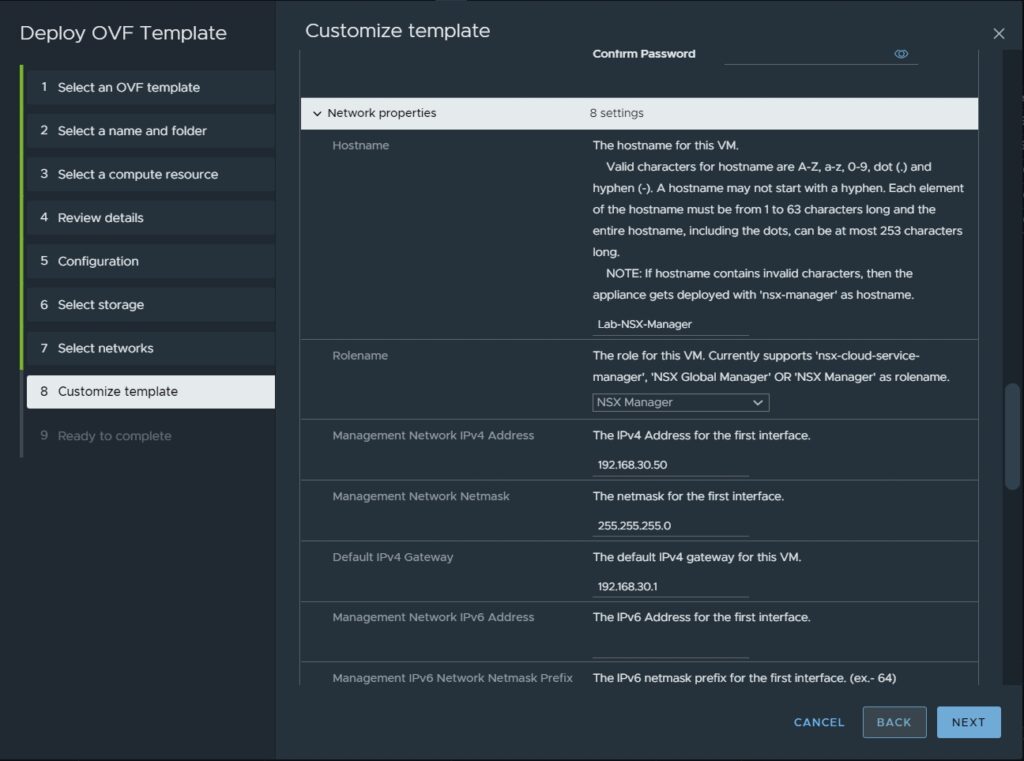
2. add two more NSX Managers to the installed NSX Manager
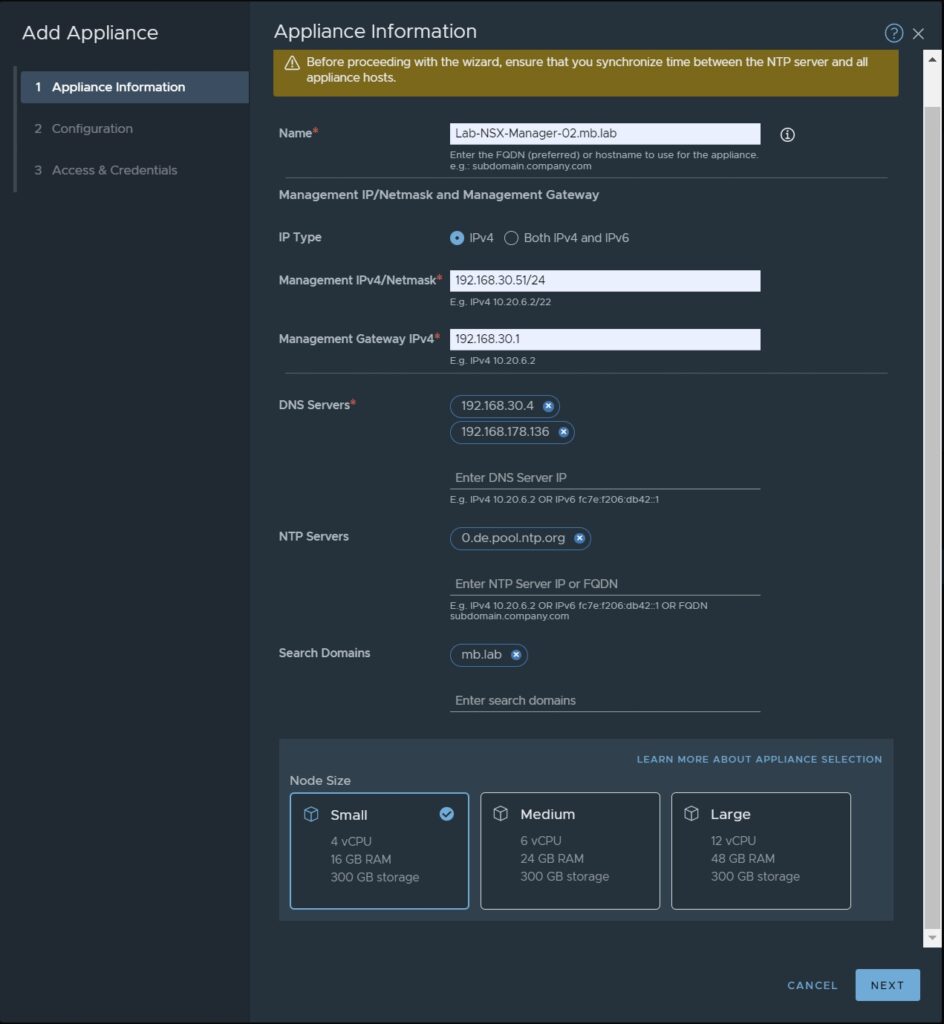
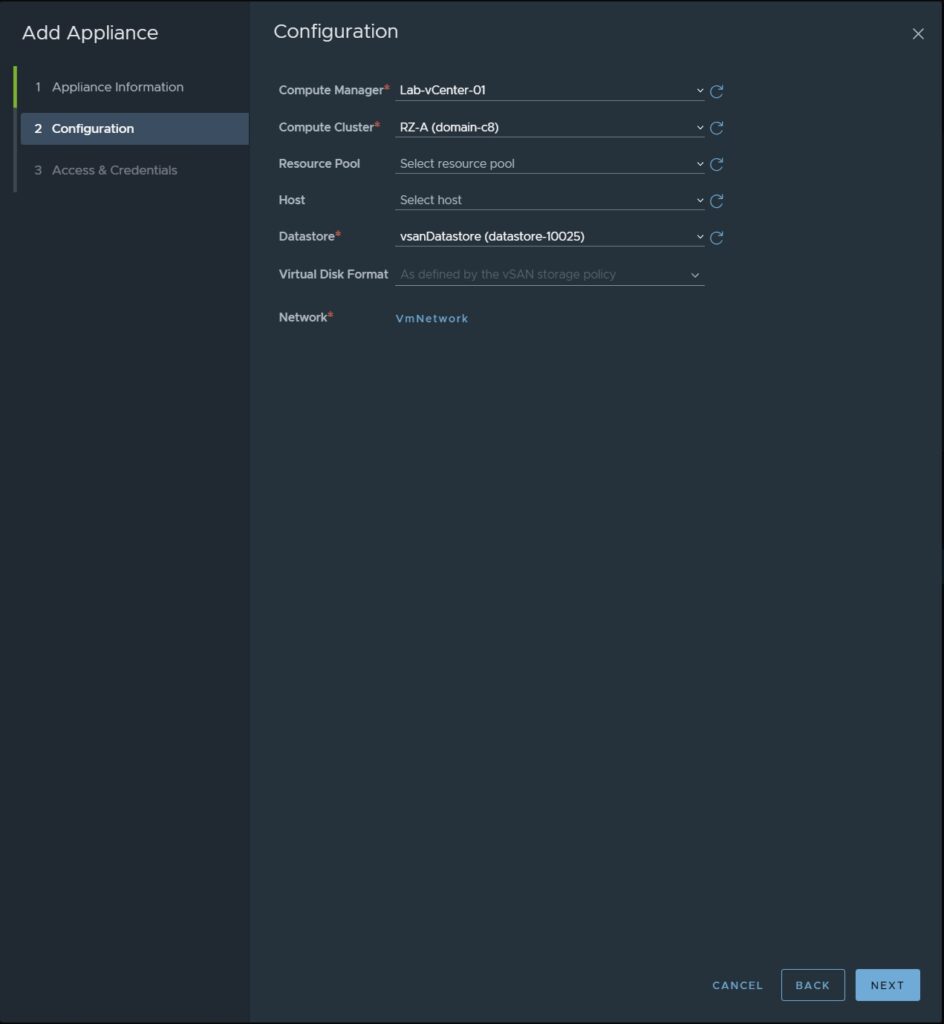
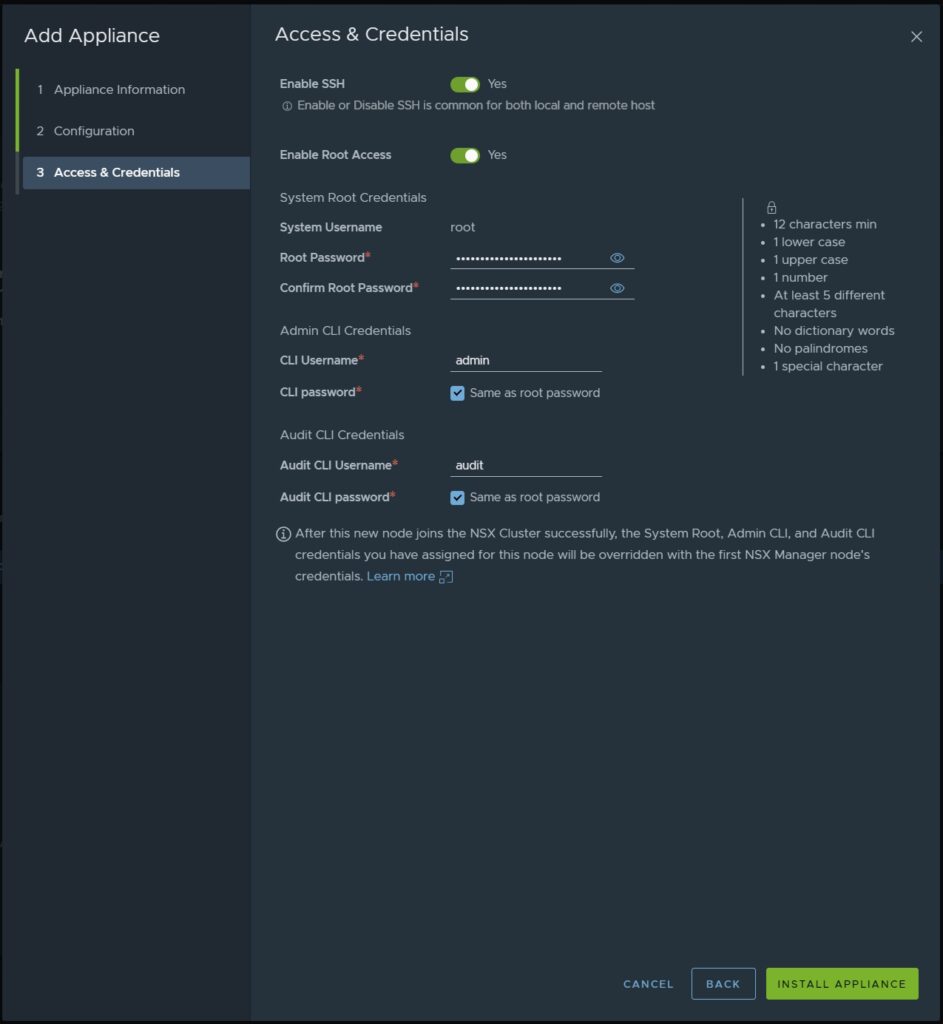
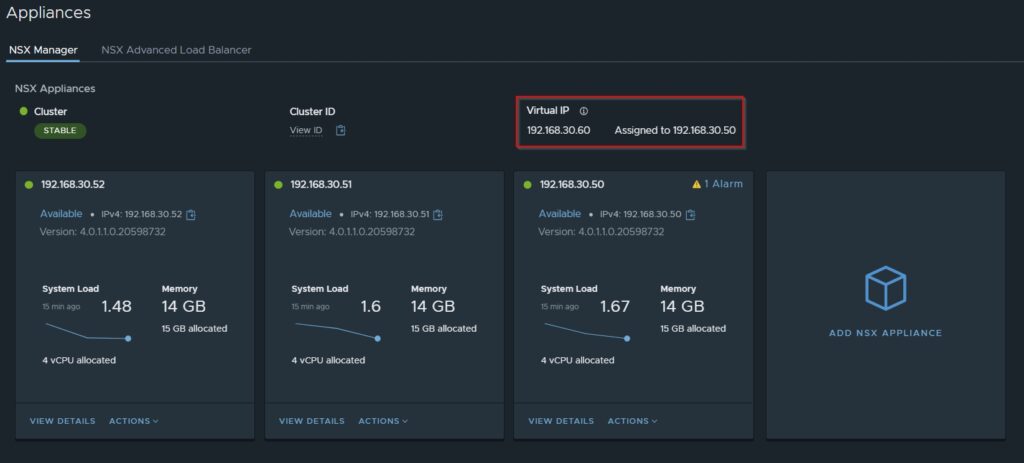
3. Create virtual IP for NSX Manager cluster
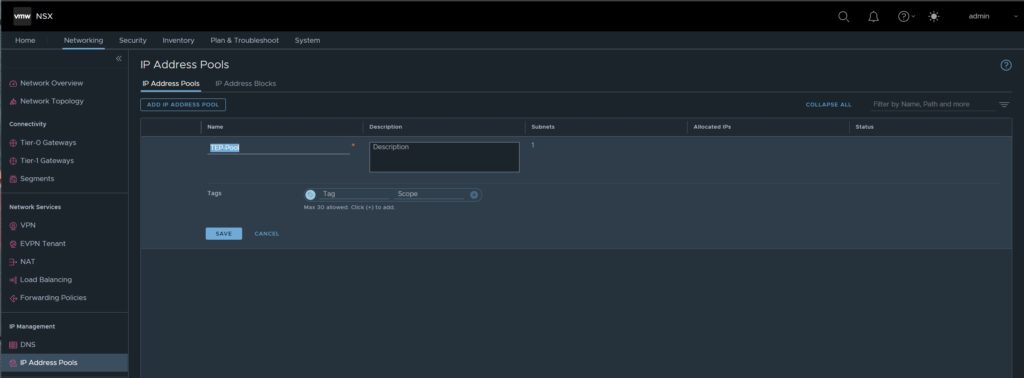
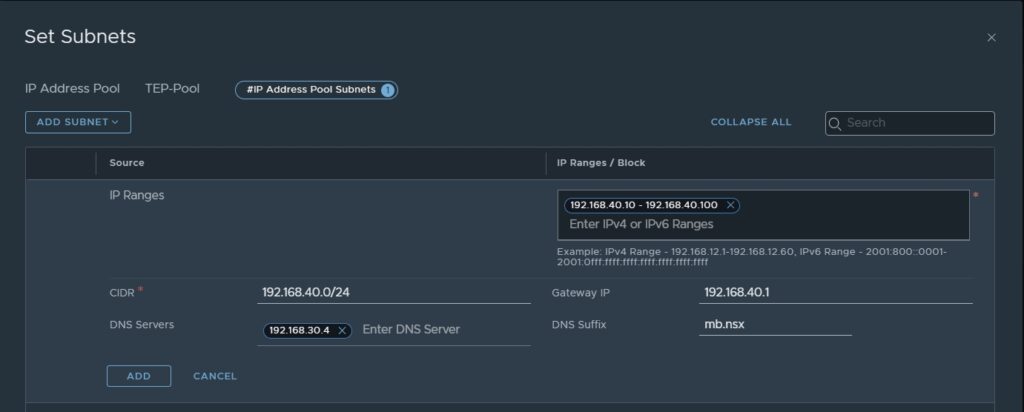
4. create IP address pool for TEP interfaces
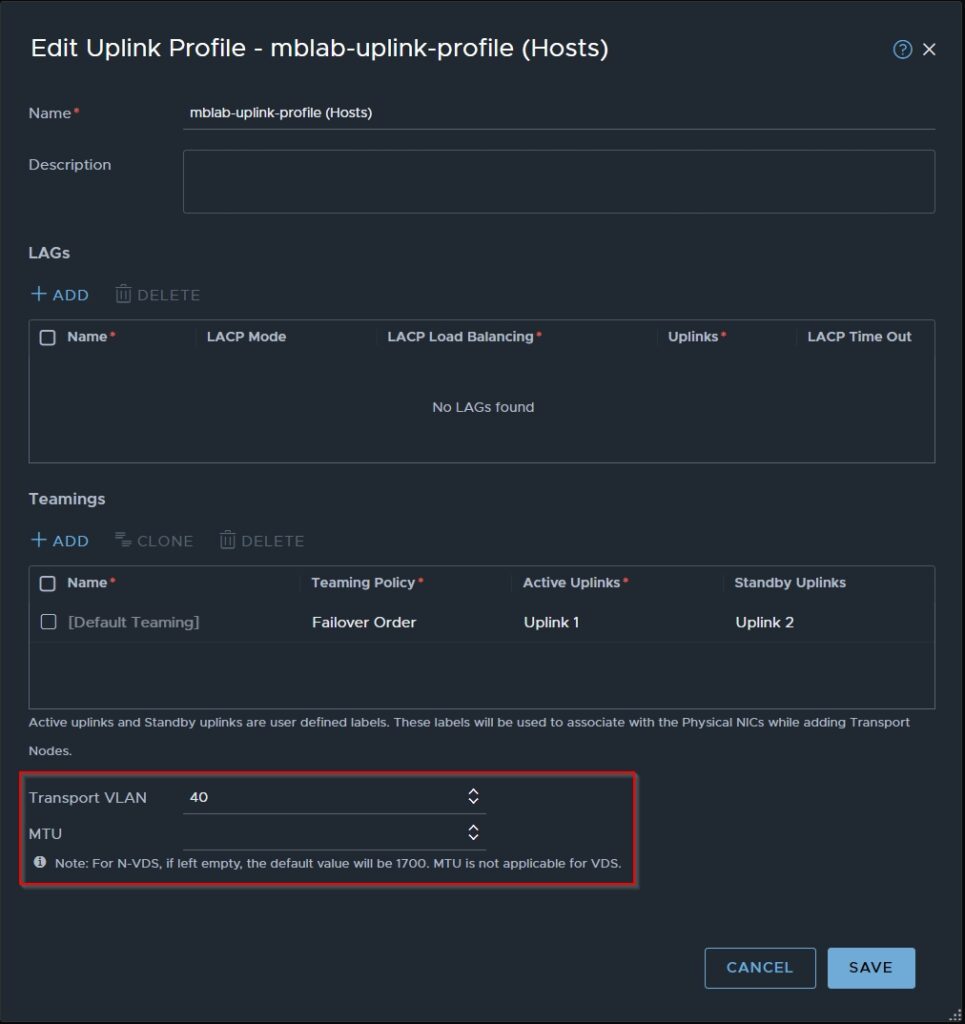
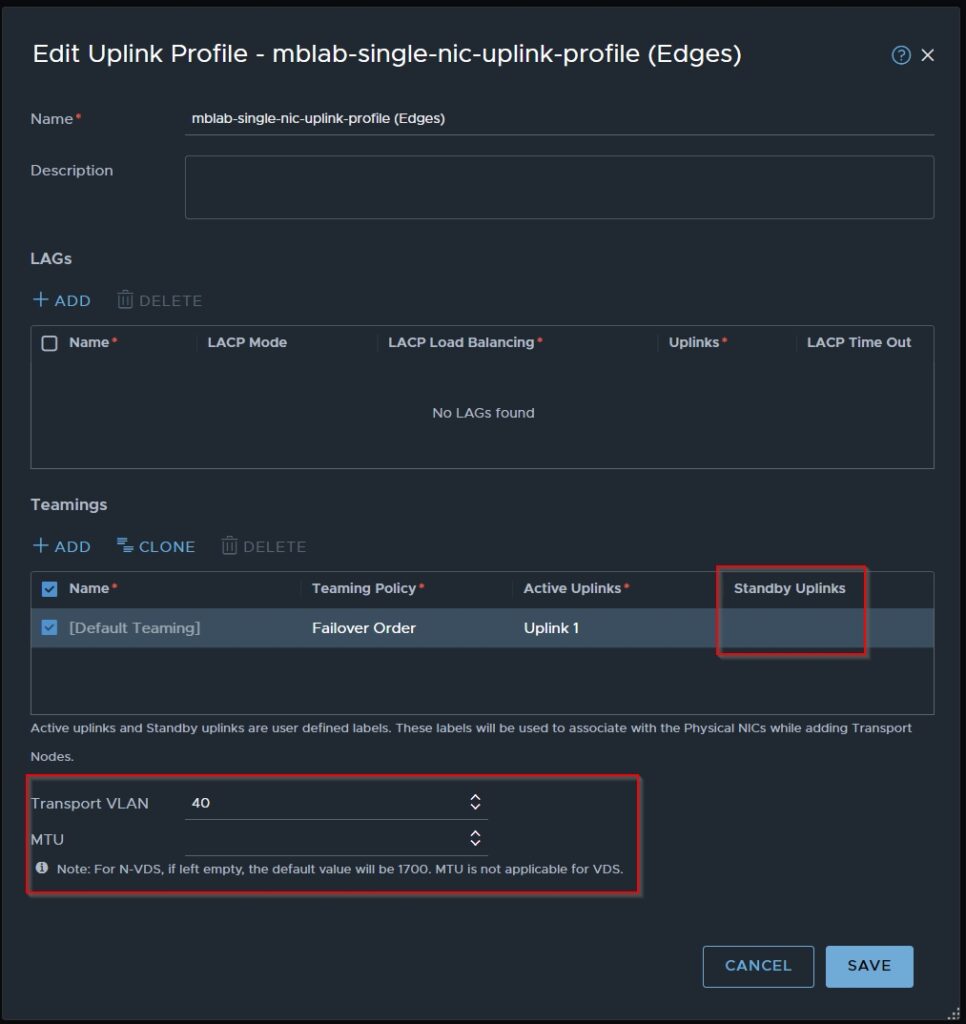
5. create Uplink Profiles for ESXi Hosts & Edges

Uplink Profile for the ESXi Hosts
Uplink Profile for Edges
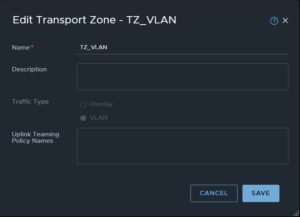
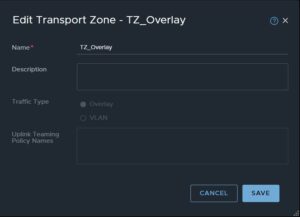
6. create Transport Zones for Overlay & VLANs

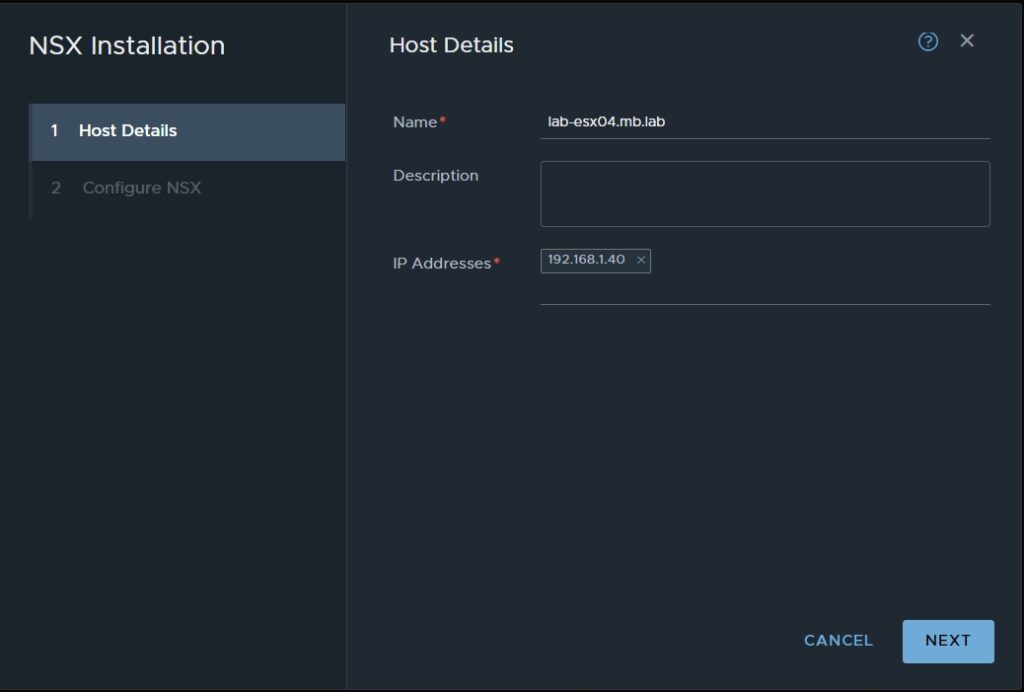
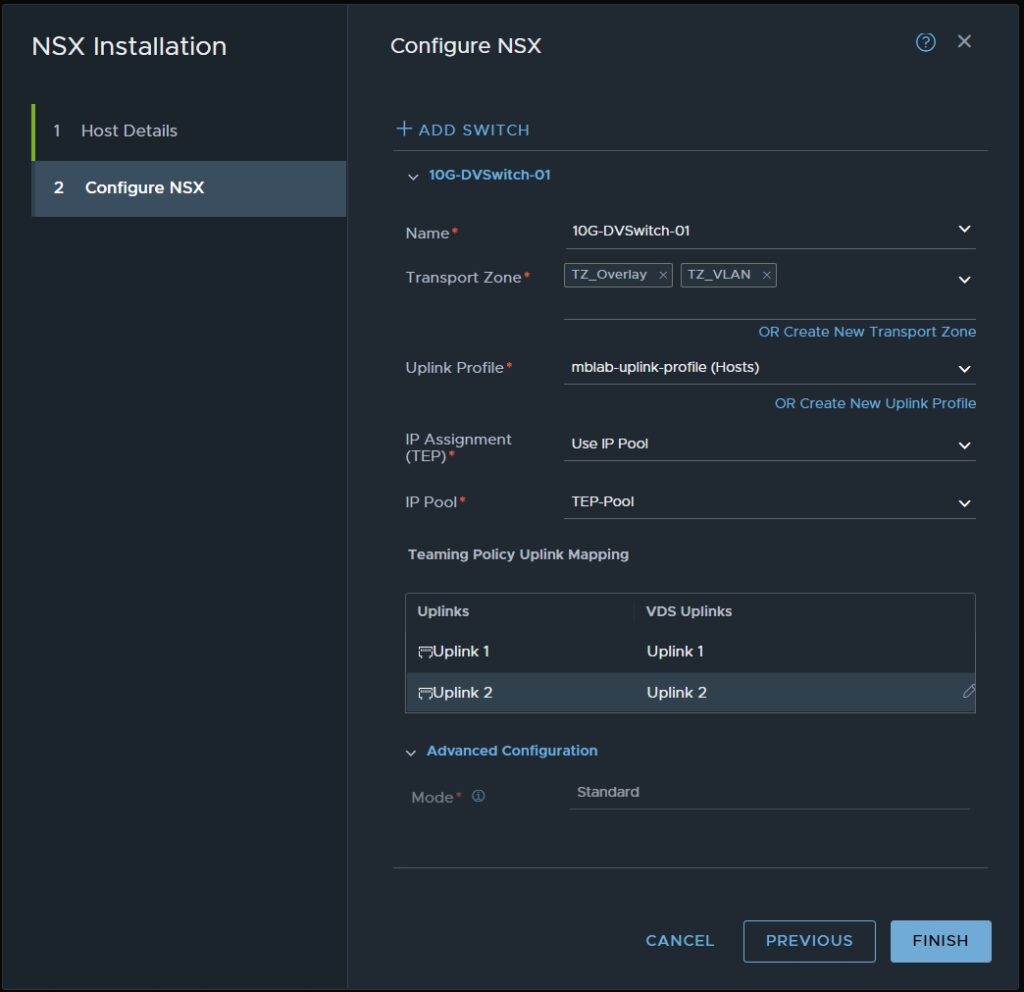
7. Install NSX on ESXi Hosts

8. Creating Uplink Segments
Trunk Segment
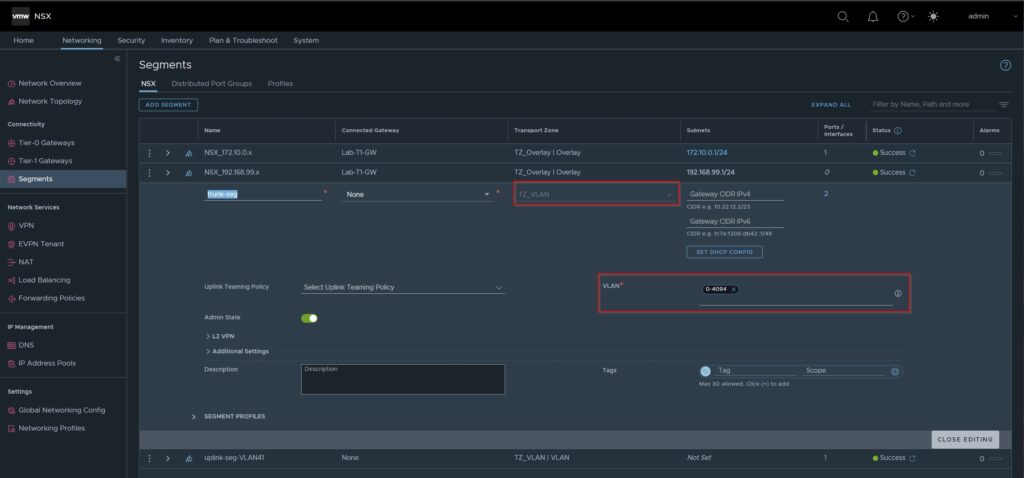
Uplink Segment VLAN41 in my case for later T1 Communication

9. Installing Edges

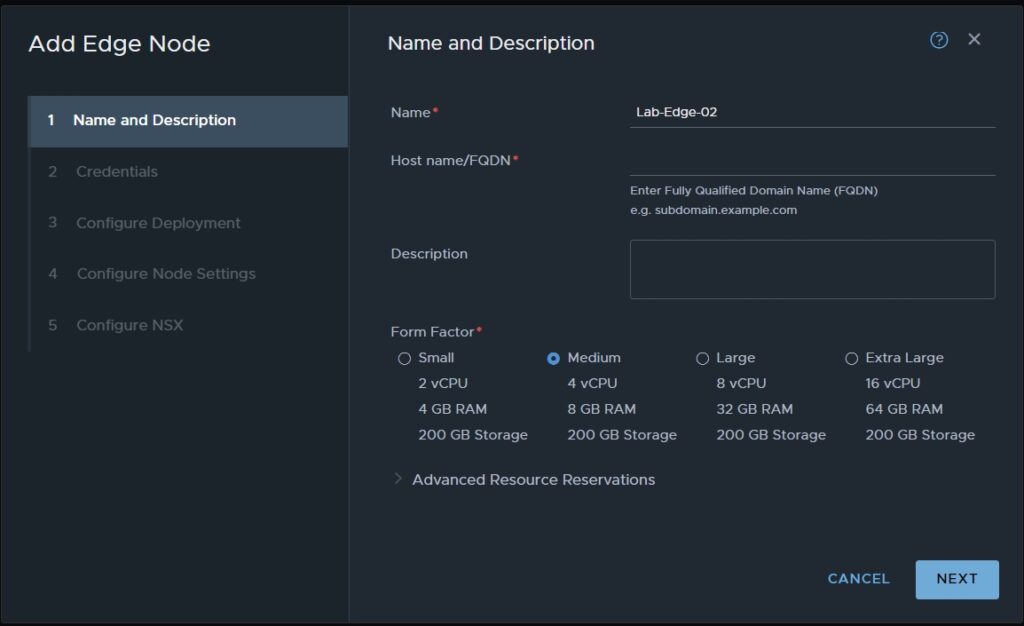
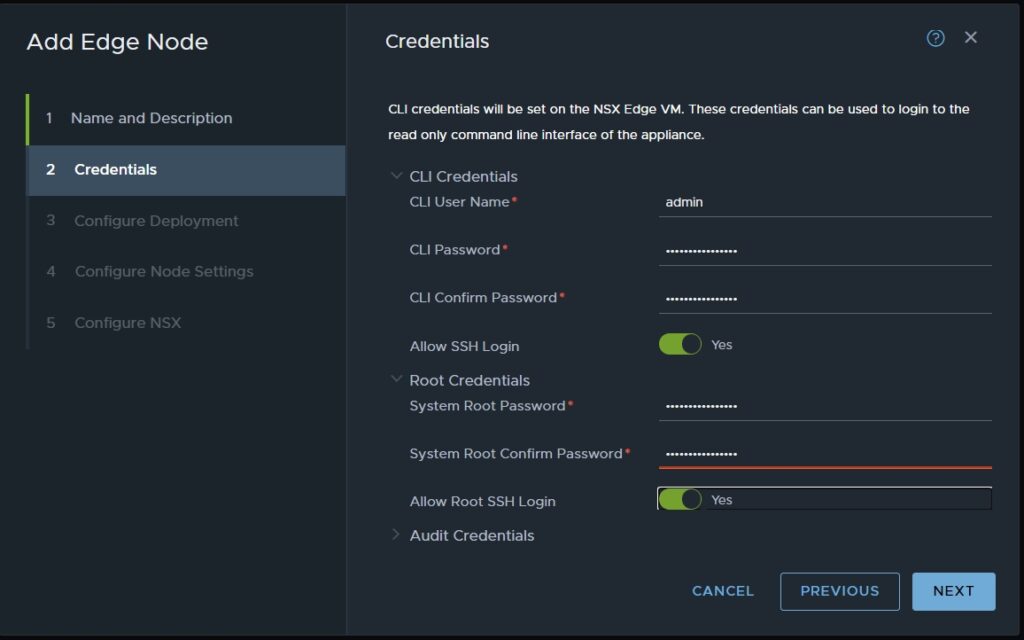
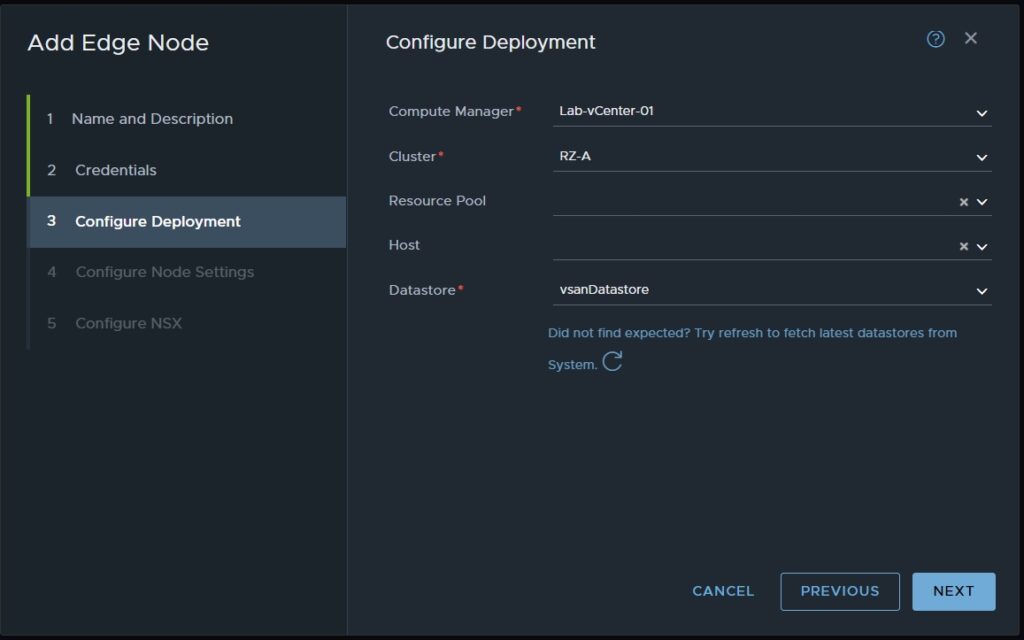
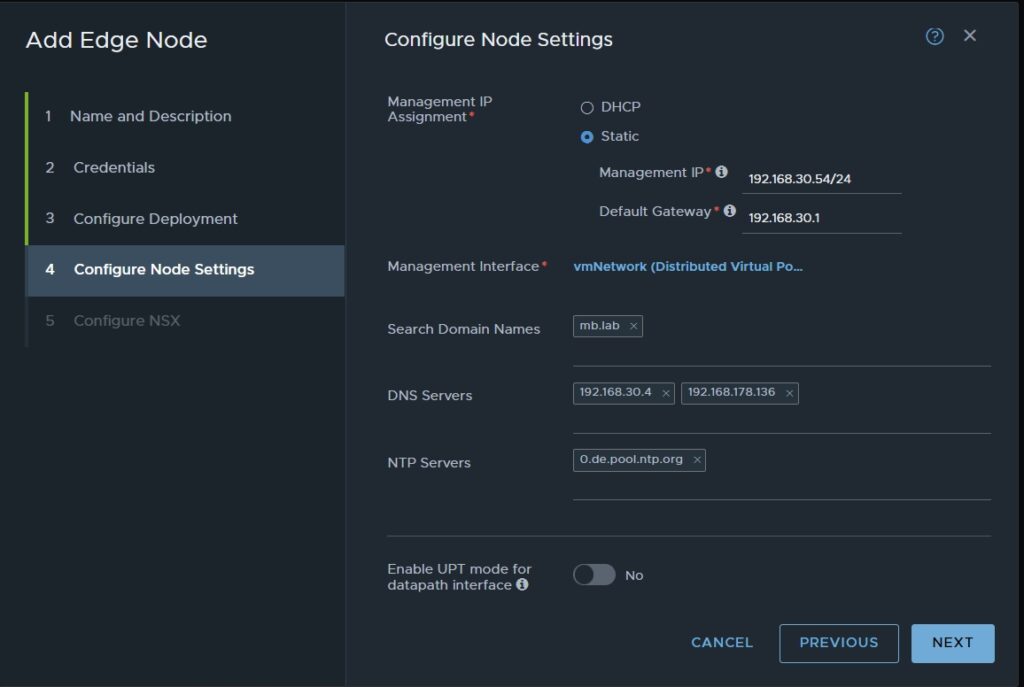
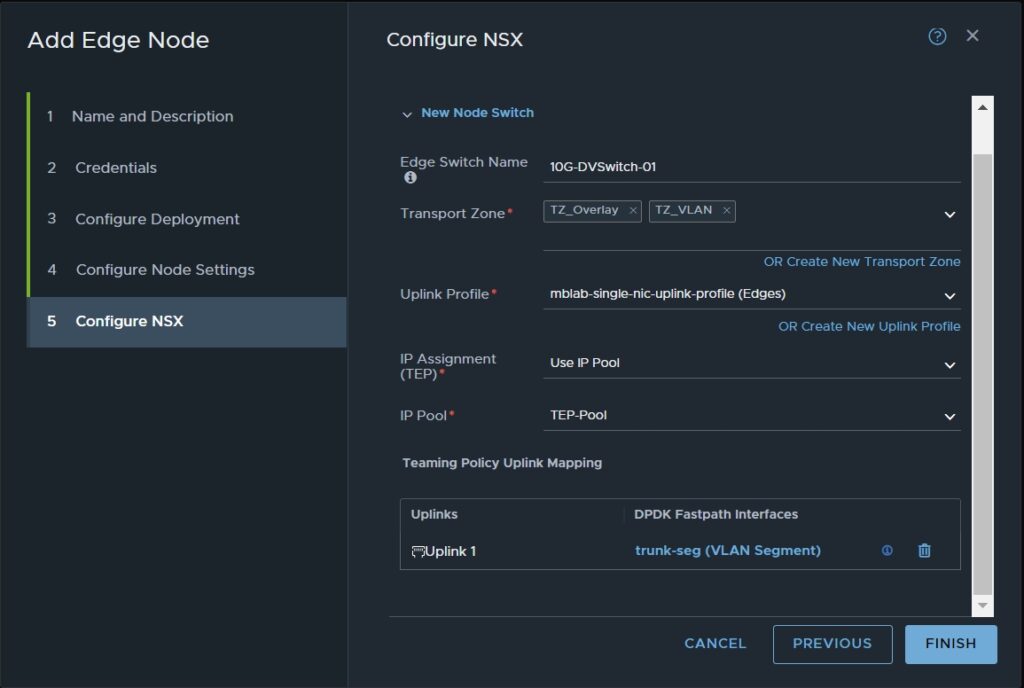
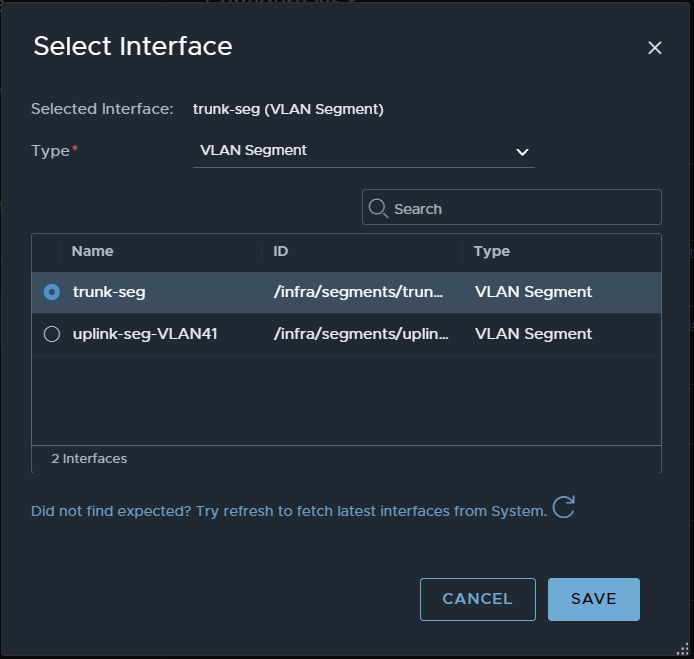
10. Creating Edge-Cluster


11. Creating Tier-0 Gateway
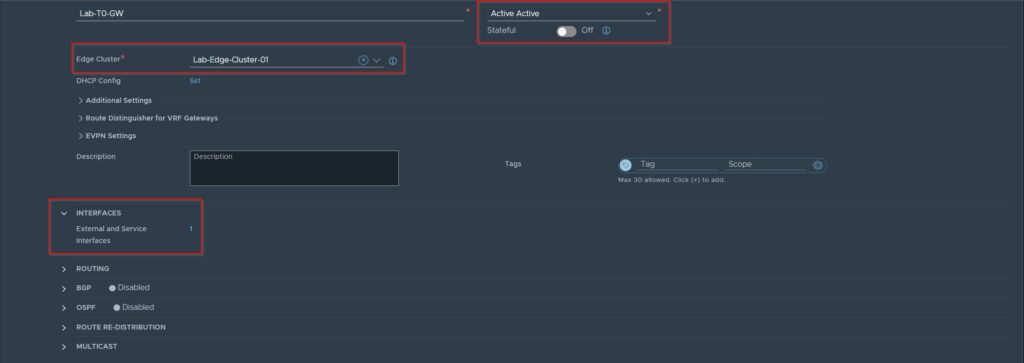
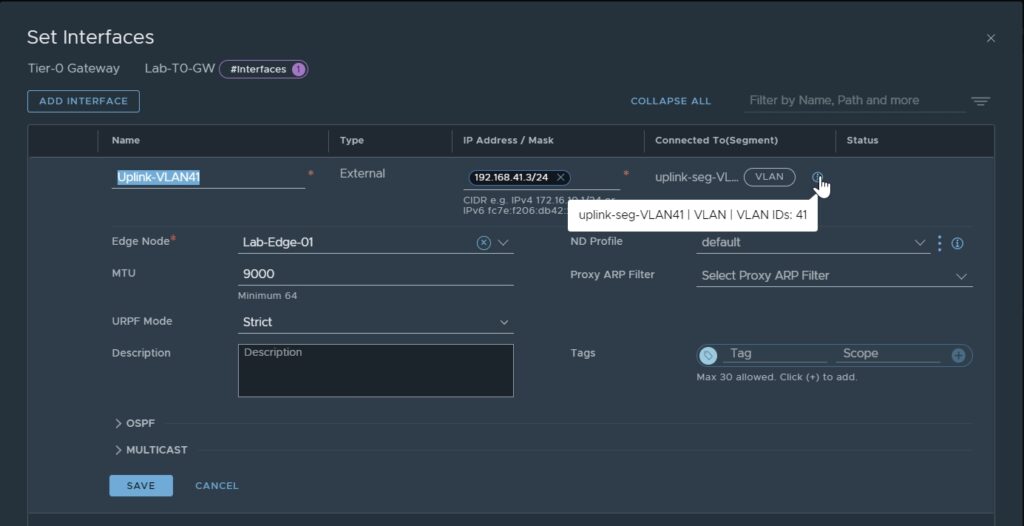
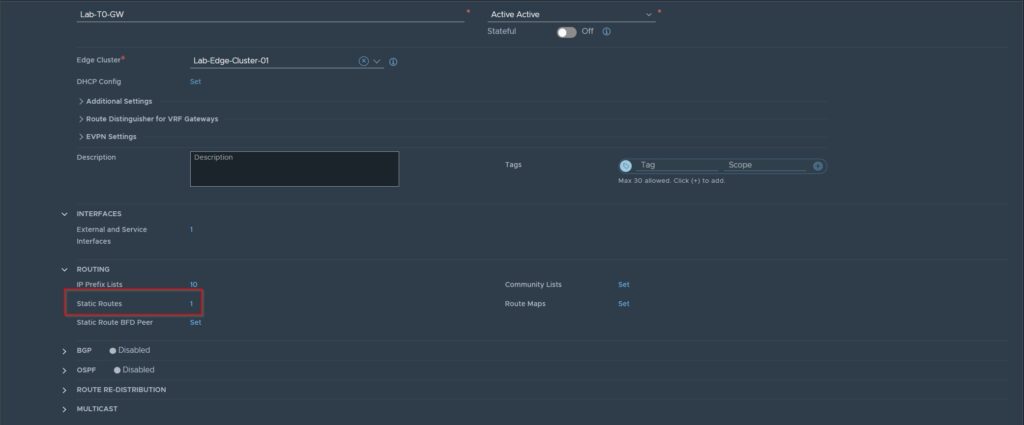
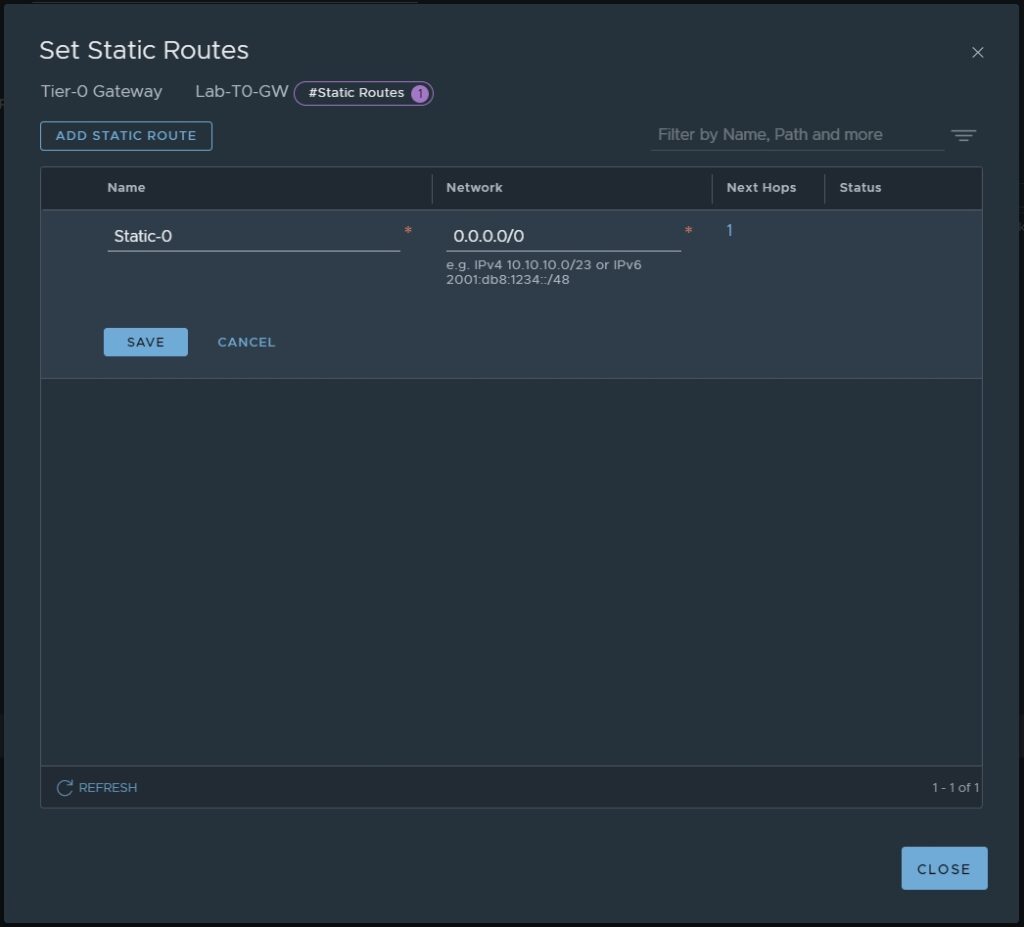
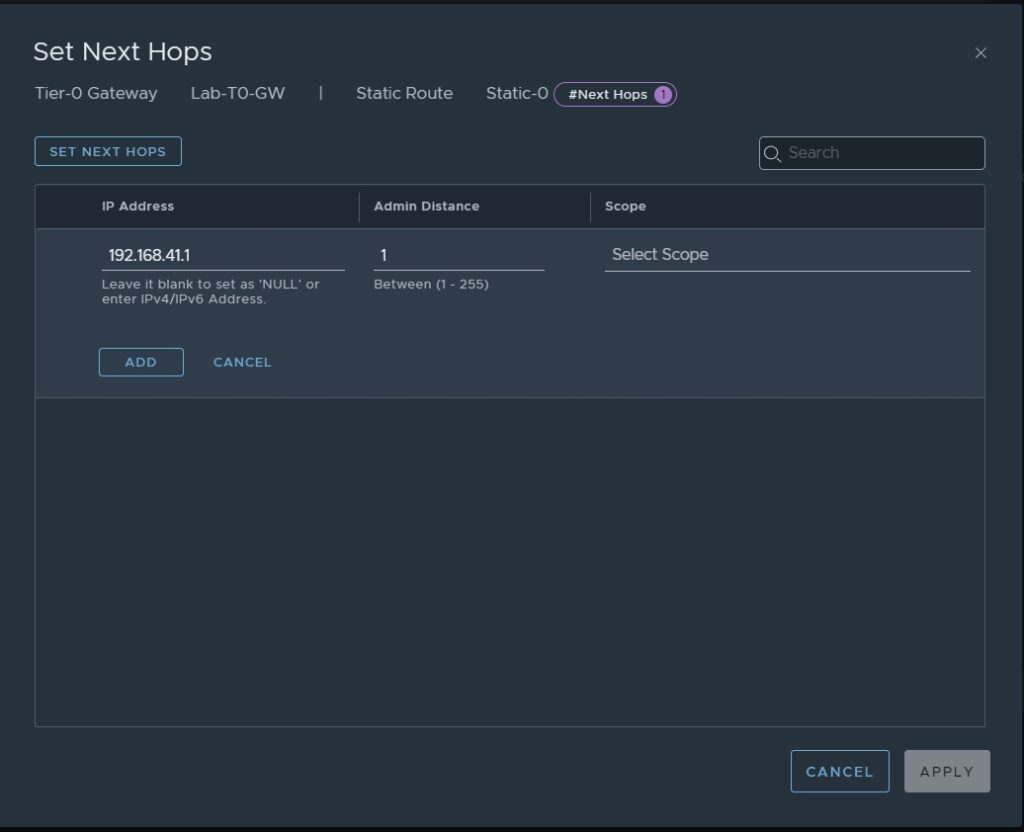
12. Creating T1 Gateway
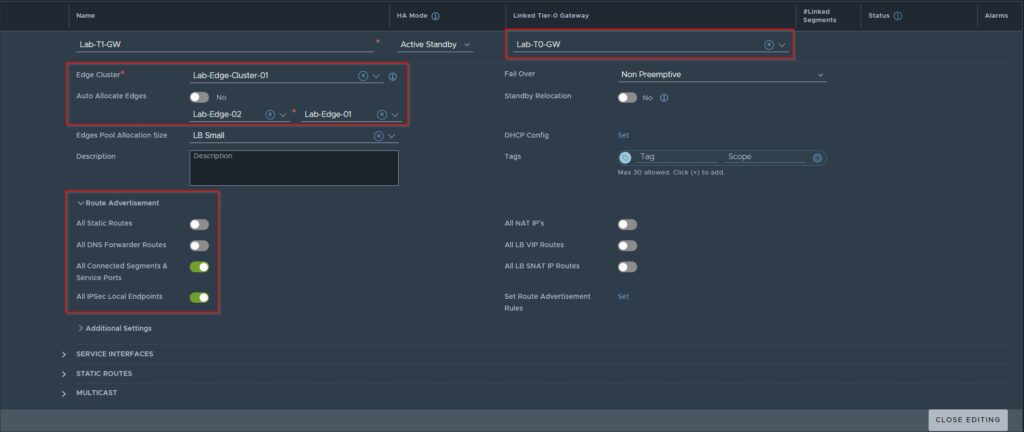
13. create NSX Segments for future usage

14. take care of routing in your physical network infrastructure
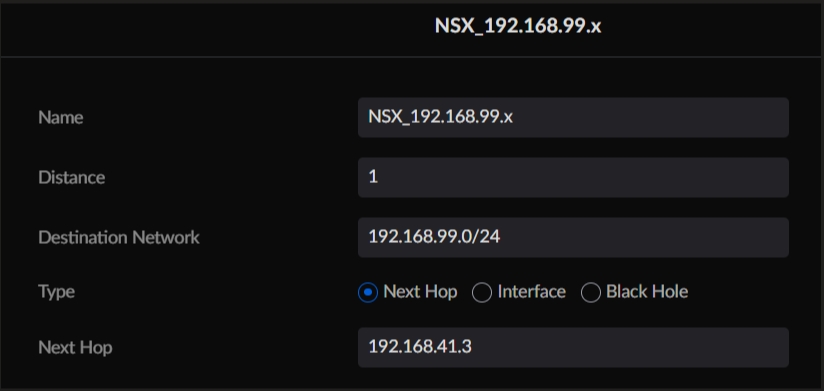
The Example is showing the routing configuration in my Ubiquiti Dream Machine Pro Router, which can be different in your environment 😉
15. Place VMs in your NSX Segments
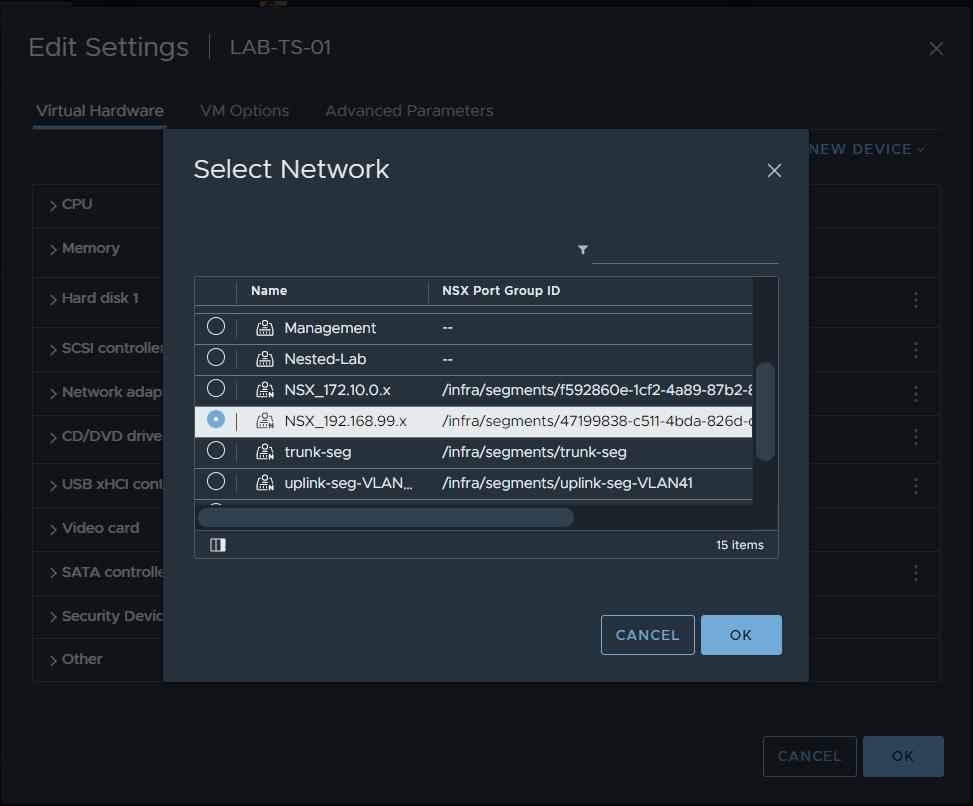
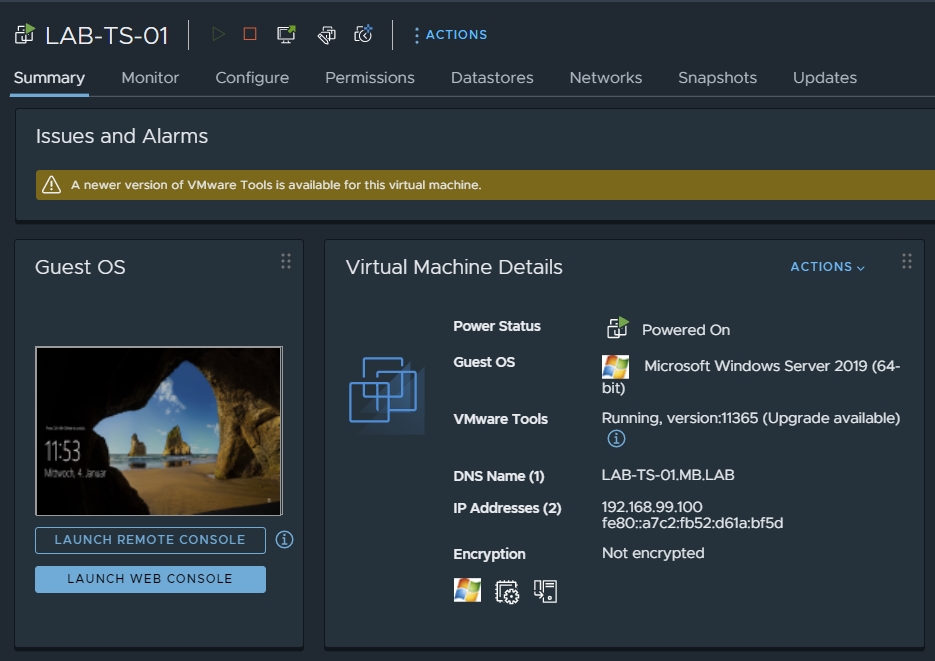
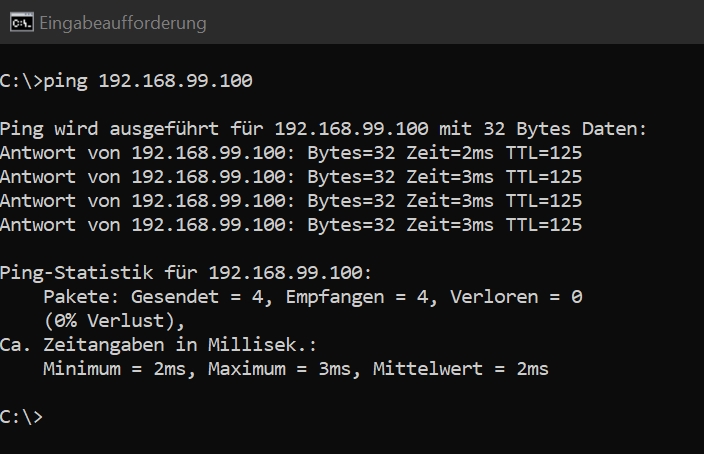
16. reviewing NSX Network Topology
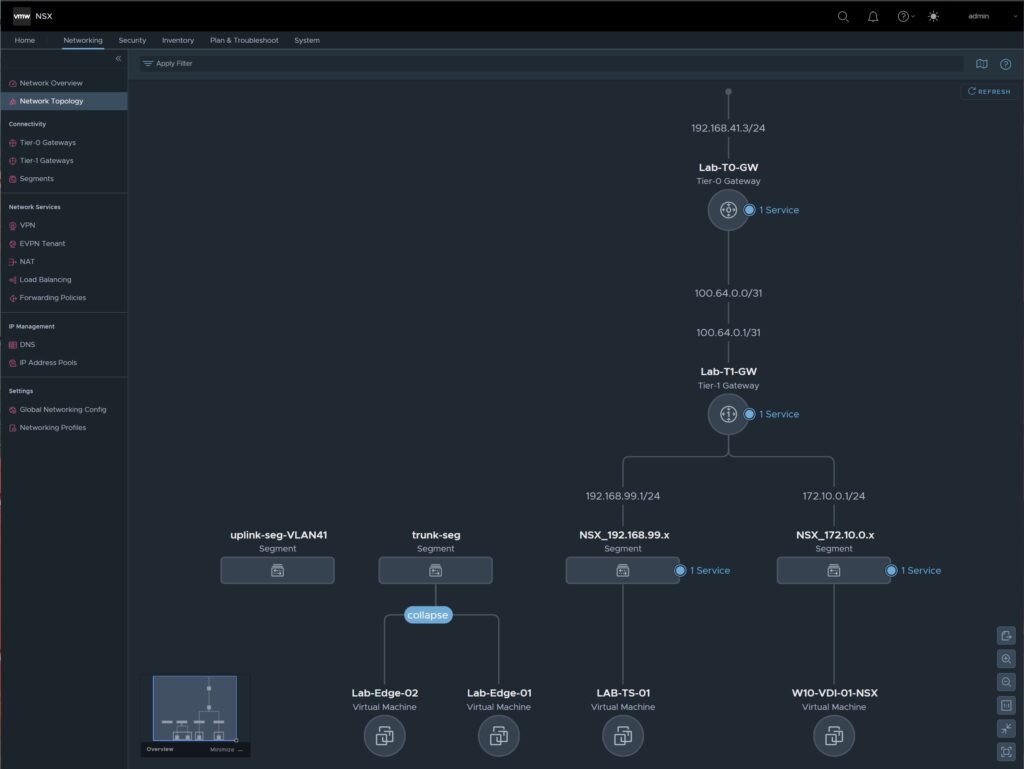
With that, we’ve done it and built a simple NSX environment that can be used for labs and also PoCs.
If you have any questions or suggestions, feel free to contact me or use the comment function here under the post.
In further tutorials, I would like to show you in the future how to exchange the certificates of NSX and would like to expand my environment to micro-segmentation with the goal of being able to provide a multi-tenant VDI environment.
So check back here from time to time or give me feedback on what you would like to see more tutorials.

No responses yet