Many of you are probably also annoyed by the certificate error message in the browser when you administer your NSX environment. Unfortunately, certificate handling in NSX is not very easy and has a few pitfalls. Therefore I would like to show you in the following tutorial how to replace the self-signed certificates of the NSX Manager with certificates signed by a CA.

The following steps are necessary to exchange the certificates:
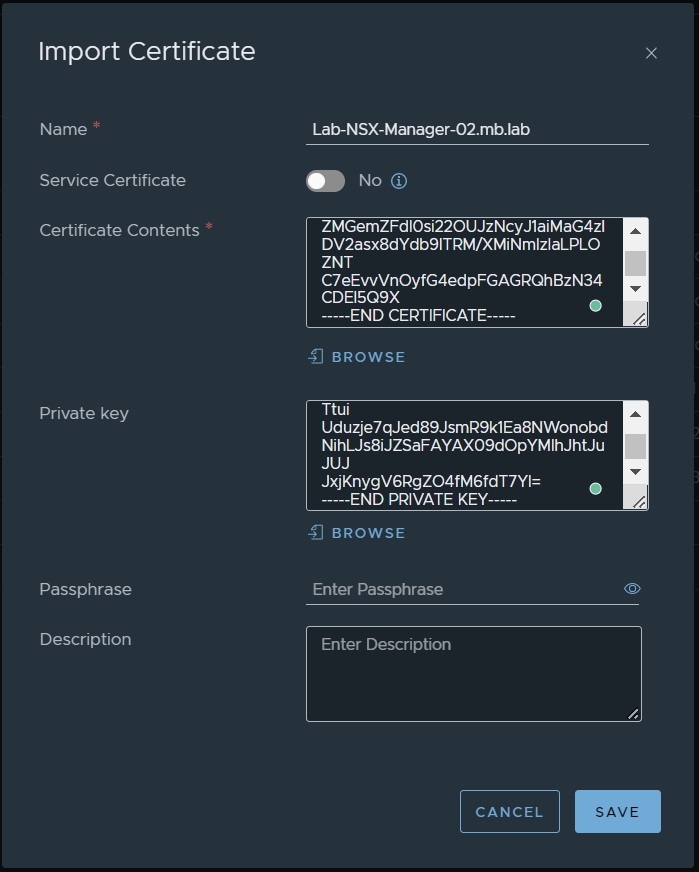
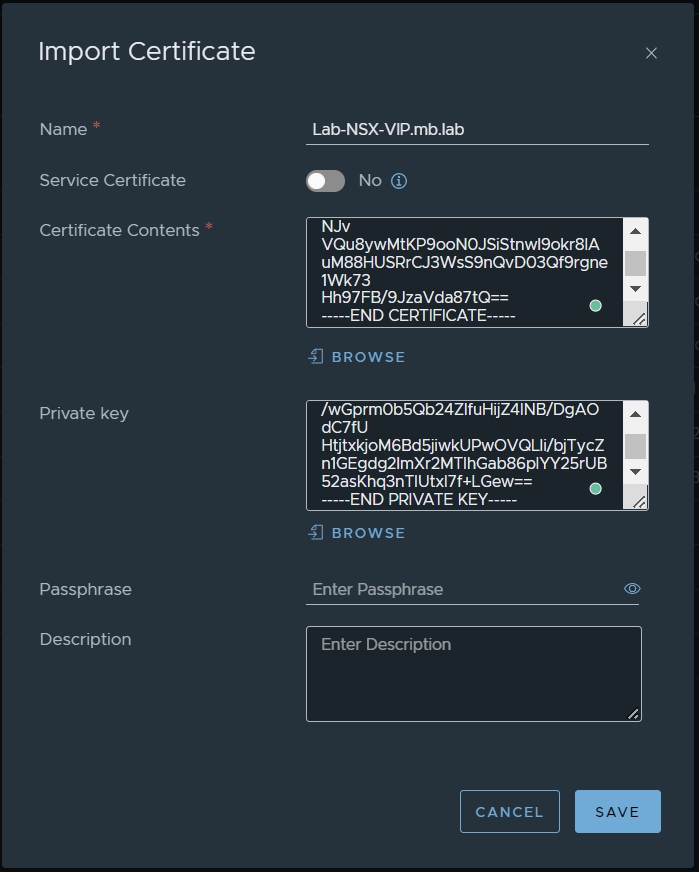
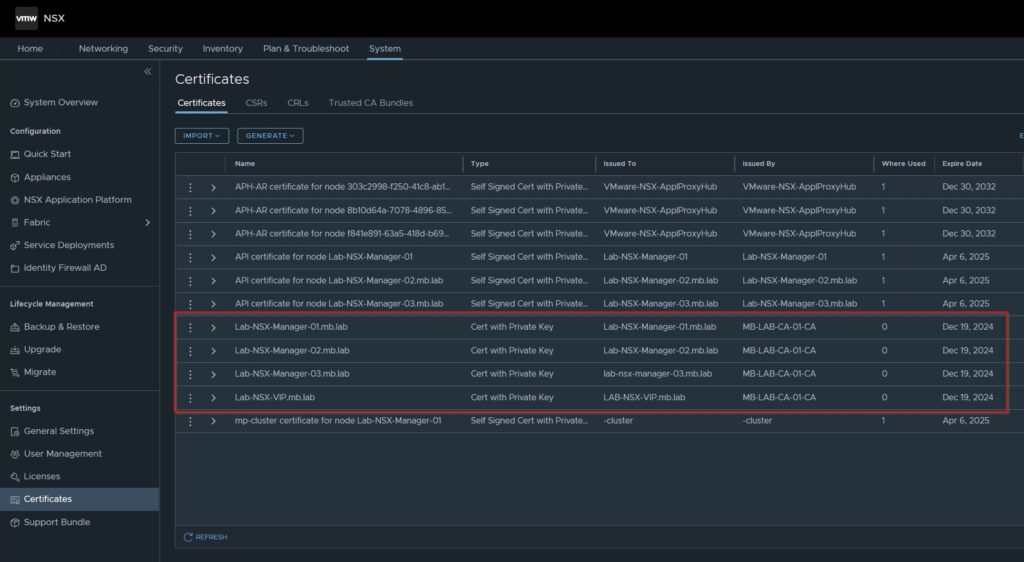
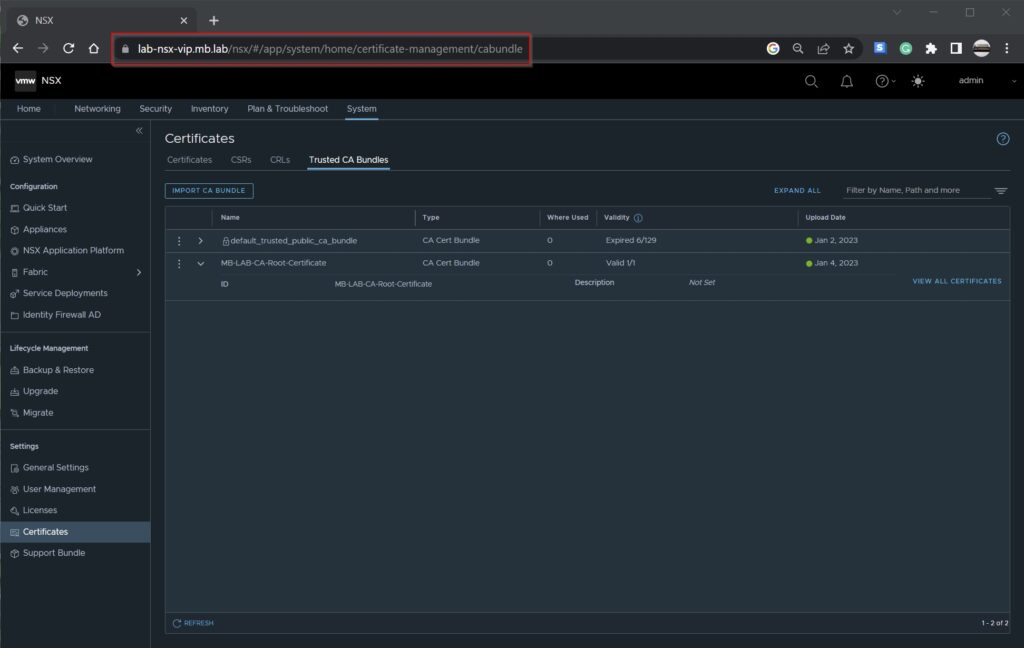
1. Import certificates into NSX Manager

field you must enter your Certificate & Root Certificate of your CA.

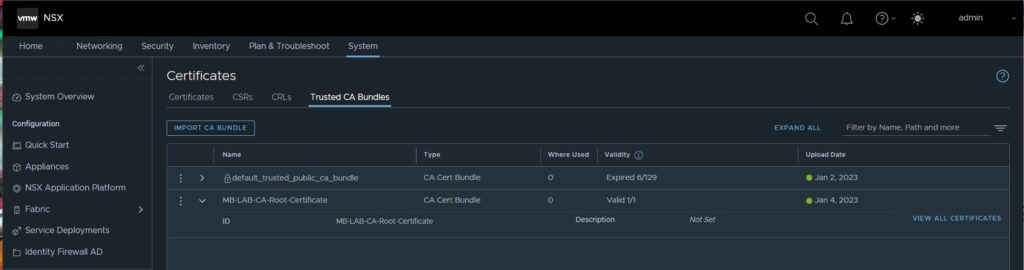
2. Import your Root Certificate from your CA

3. Activate imported Certificates for NSX Managers & Cluster VIP
Unfortunately, certificates in NSX can only be activated via API call. Therefore, it is currently time to deal with API calls. I have done the whole thing with Postman and show it to you in the following. Alternatively, you can access the API via Curl.
You need two API calls, one for the managers and one for the cluster VIP.
https://<nsx-manager-ip>/api/v1/node/services/http?action=apply_certificate&certificate_id=<certificate_id>

https://<nsx-cluster-vip-ip>/api/v1/cluster/api-certificate?action=set_cluster_certificate&certificate_id=<certificate_id>
You should know the IP addresses of your NSX managers and also the cluster IPs with respective DNS names. You can easily copy the Certificate IDs from the NSX Manager.

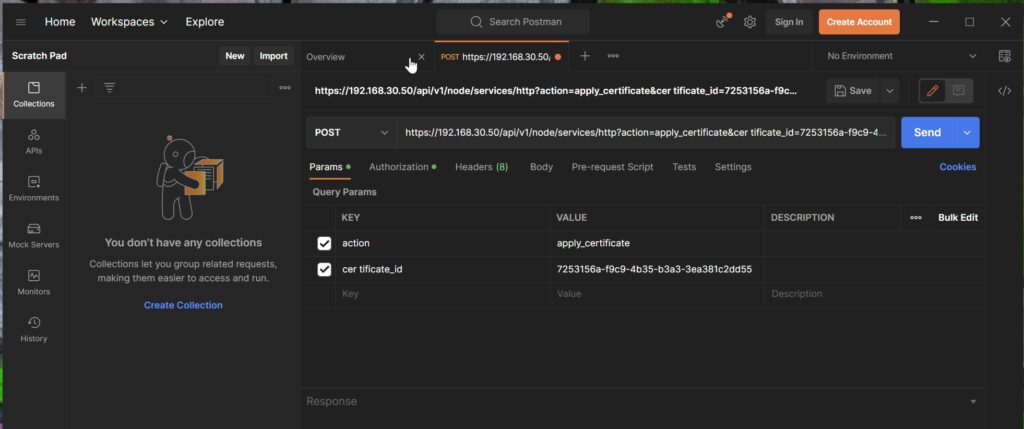

In addition, make sure that you have changed the method of the API call to “Post”.

Repeats these steps on all NSX Managers.
When all NSX Managers are done, the command for the cluster VIP address comes next
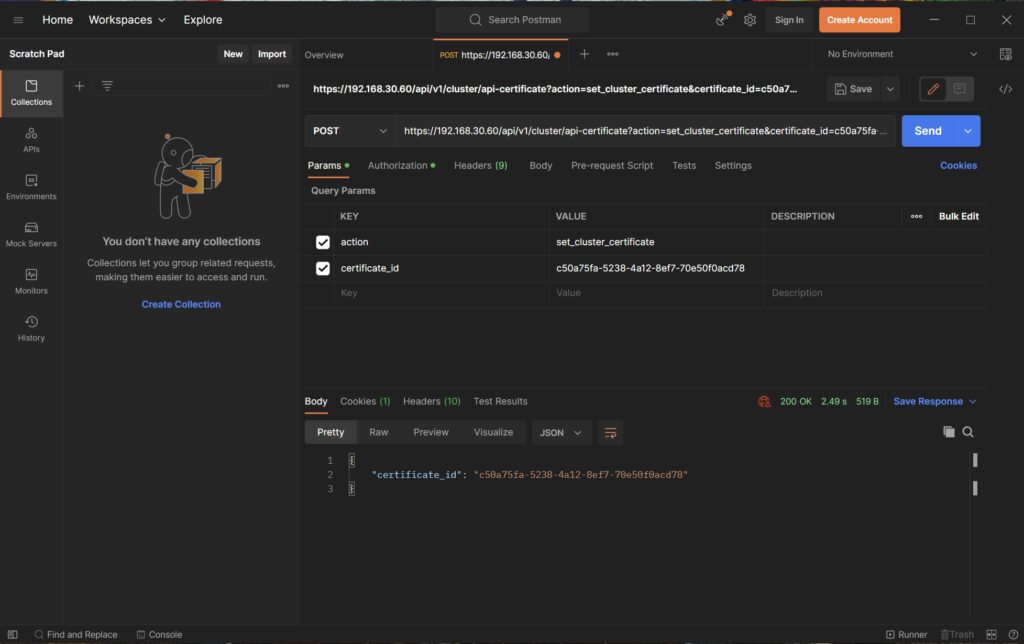
After you have performed all these steps, all certificates for NSX Manager and Cluster VIP are swapped.
If you don’t have a Postman available, you can do the same with a curl command directly on the NSX managers.
curl -k -H 'X-NSX-USERNAME:UC' -H 'X-Nsx-Group:superusers' http://localhost:7440/nsxapi/api/v1/trust-management/certificates/<id>?action=validate

curl -k -H 'X-NSX-USERNAME:UC' -H 'X-Nsx-Group:superusers' http://localhost:7440/nsxapi/api/v1/cluster/api-certificate?action=set_cluster_certificate&certificate_id=<id>"
So far so good with the certificate exchange in NSX.
If you have any questions or suggestions, feel free to contact me or use the comment function here under the post.
In further tutorials, I would like to show you in the future to expand my NSX-Environment to micro-segmentation with the goal of being able to provide a multi-tenant VDI environment.
So check back here from time to time or give me feedback on what you would like to see more tutorials.
No responses yet