The Unified Access Gateway which is mainly used for the end-user products and services from the VMware portfolio should be highly available in on-prem installations if possible. VMware UAG appliances work with any standard third-party load balancer configured for HTTPS.
So I tried it out in my lab and I will show you in this blog post how I implemented it.
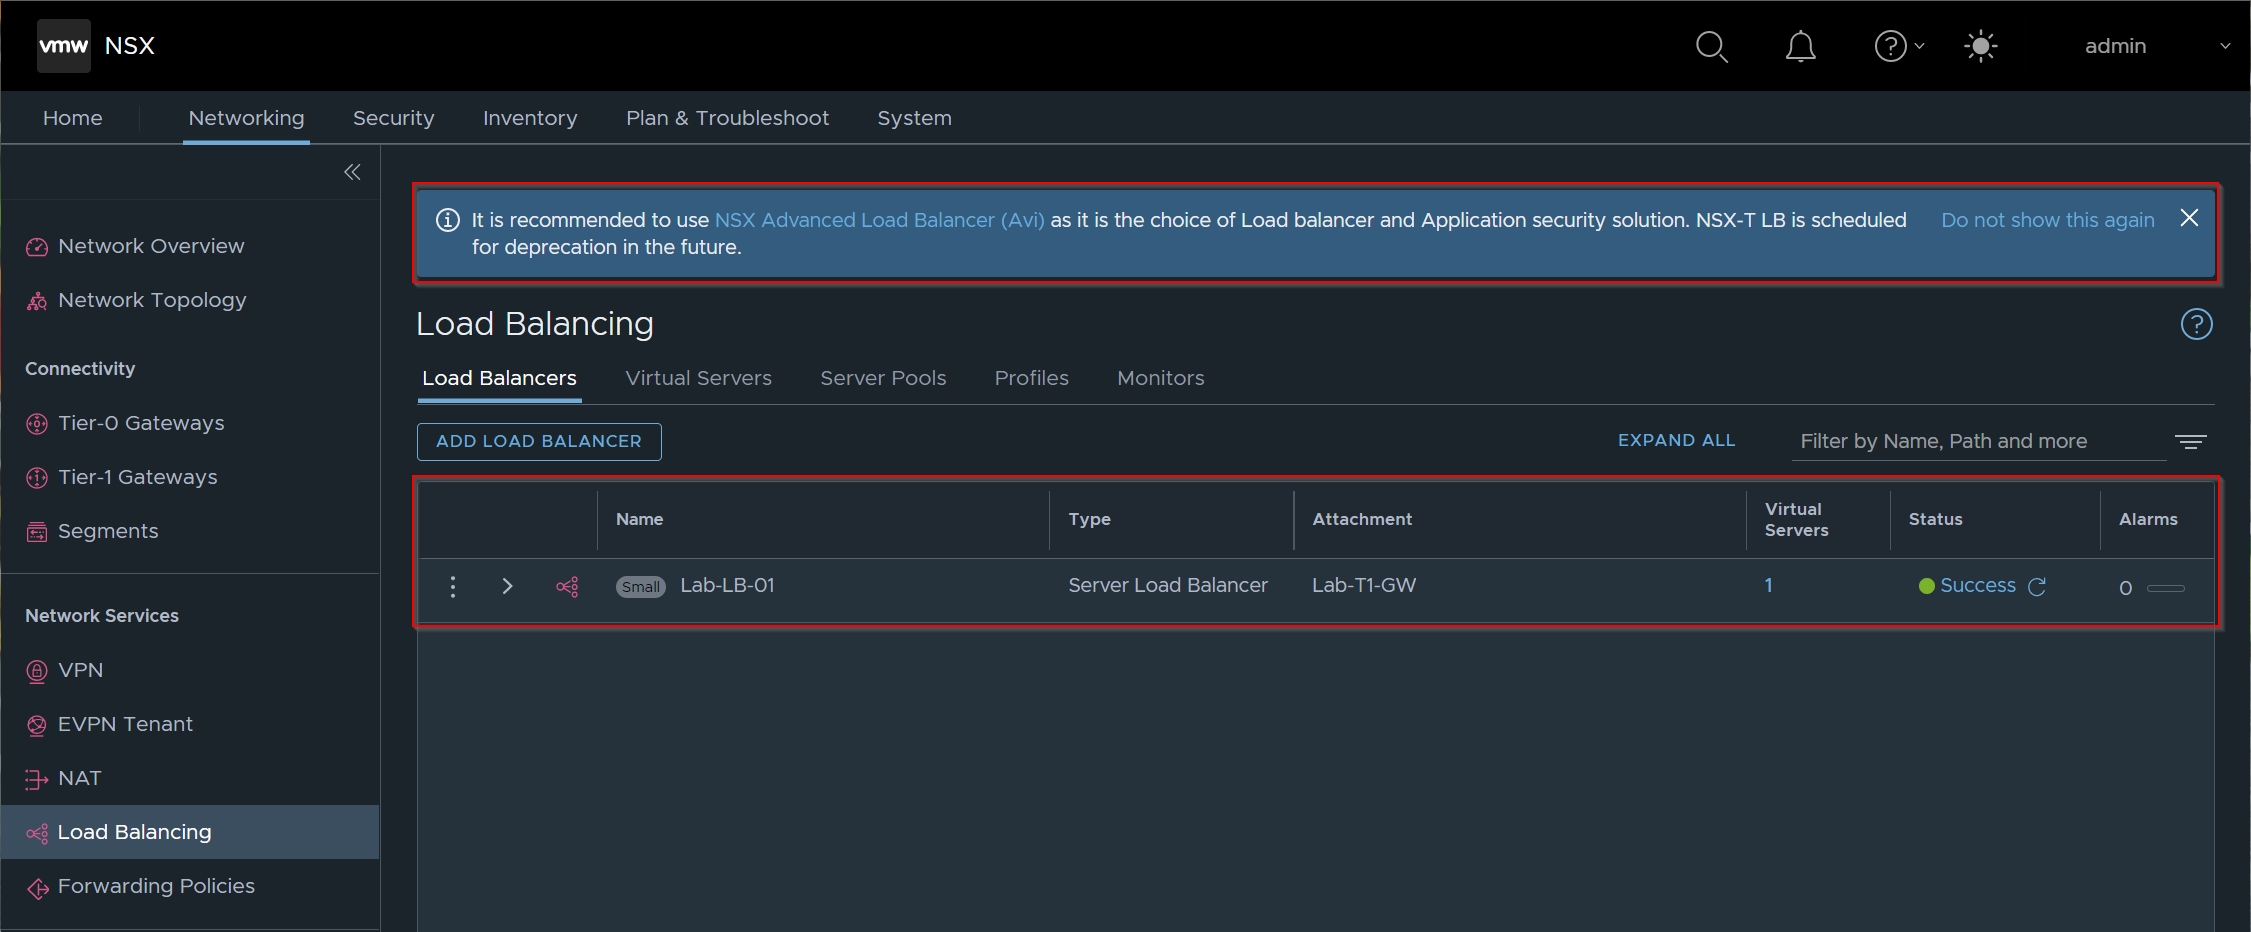
Please note that the integrated load balancer of NSX(-T) will be discontinued & replaced by the „Advanced AVI Loadbalancer“, which requires dedicated manager VMs with not insignificant resource requirements. Therefore, I have not used this load balancer in my Lab environment for the time being.
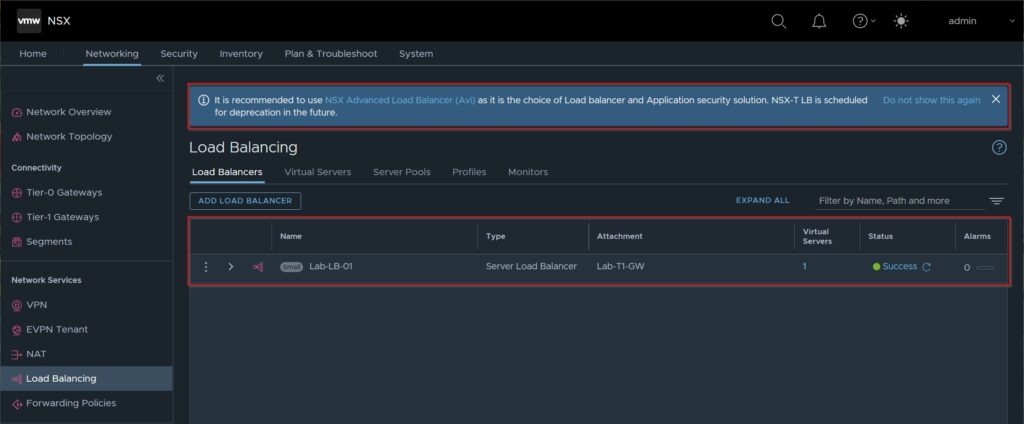
in the following I will show you how I implemented the load balancer in my lab:
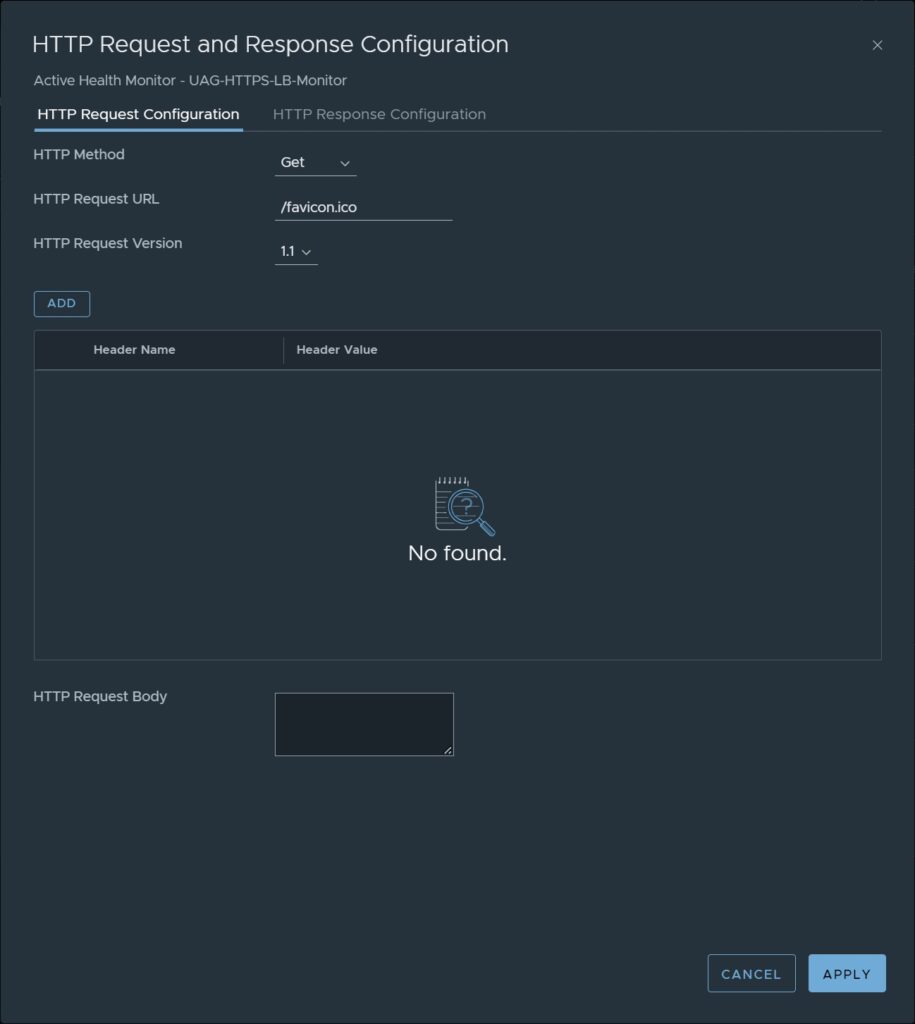
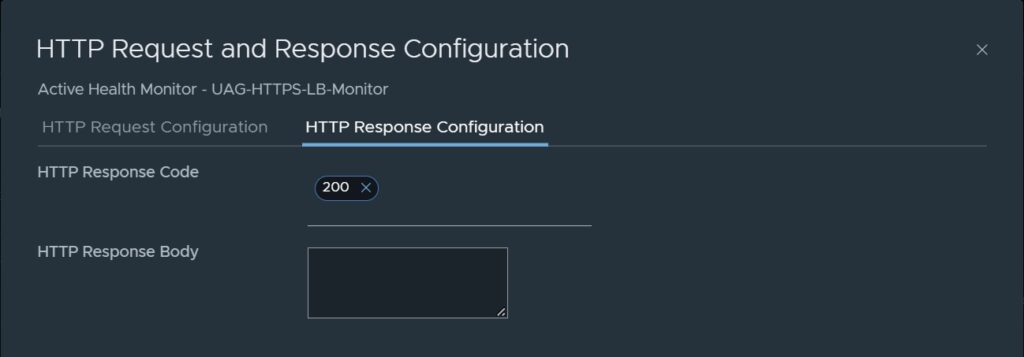
- Set up a monitor
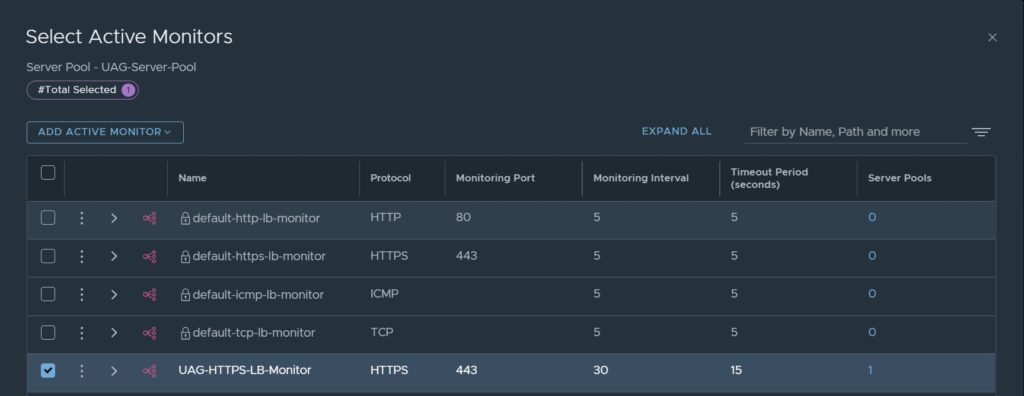
the monitor checks the load-balanced server against the service it provides. As long as the load-balanced server responds to the probe, the monitor will mark it as UP. If the load-balanced server does not respond to a defined number of probes in a given time, the monitor will mark it DOWN. Even though it is recommended to monitor all service ports of Horizon (TCP/UDP 443, TCP/UDP 8443 & TCP/UDP 4172) I decided to monitor only TCP 443 for simplicity. - Open your NSX-T Manager console, navigate to Networking, select Load Balancing and finally choose Monitors
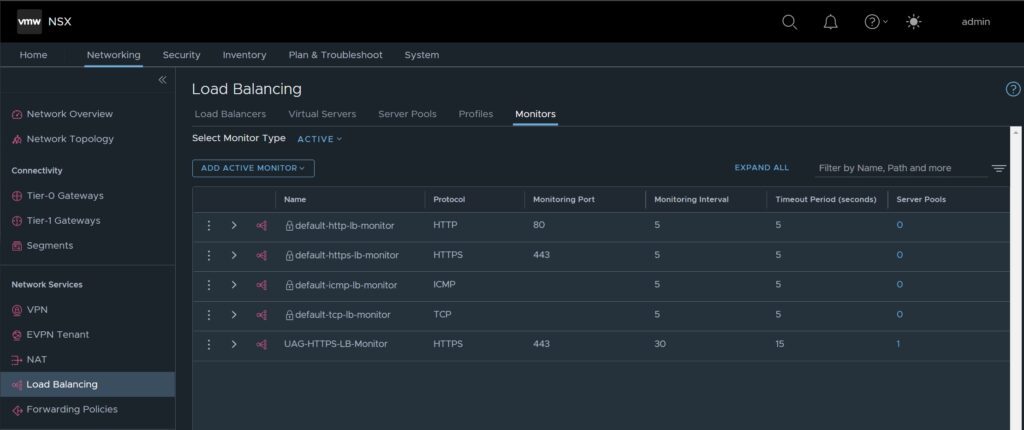
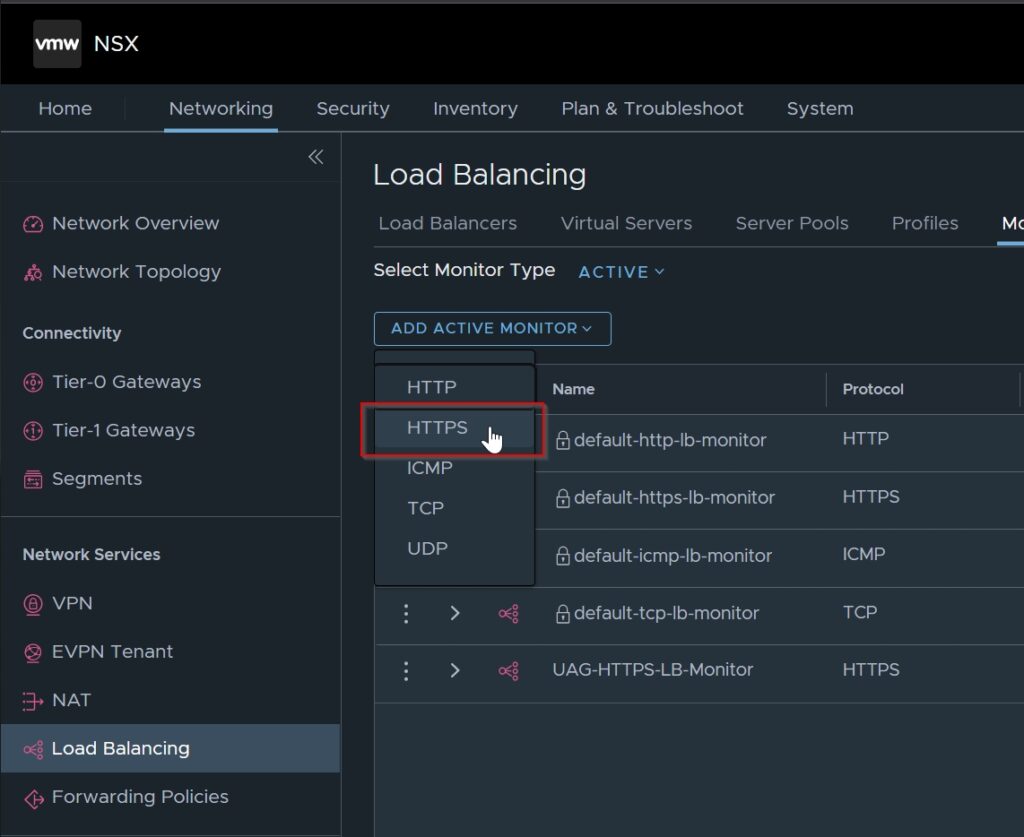
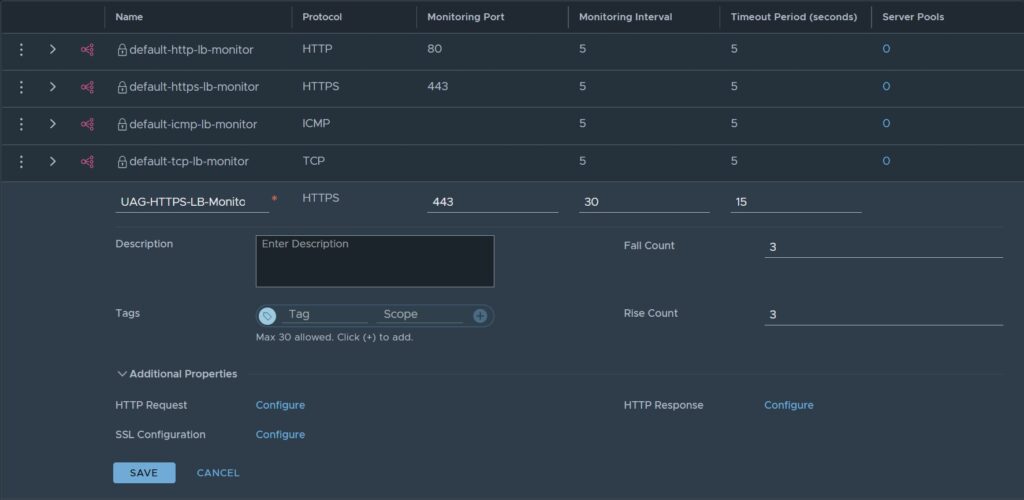
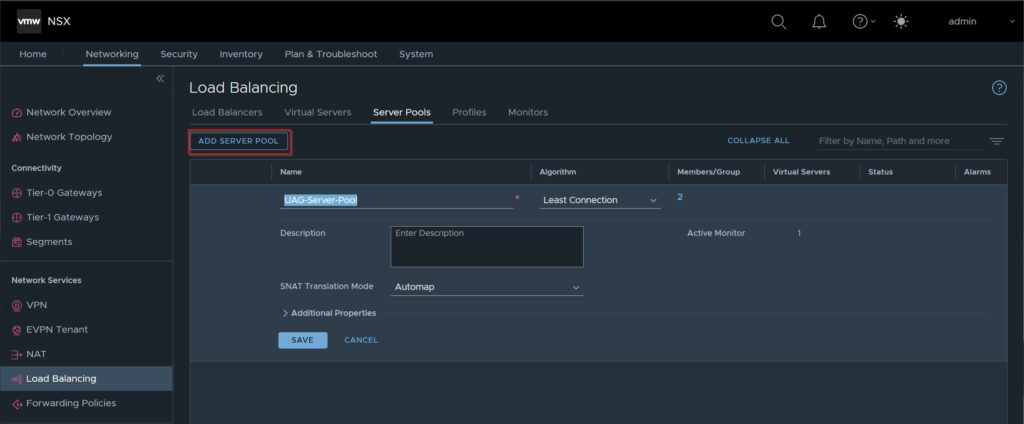
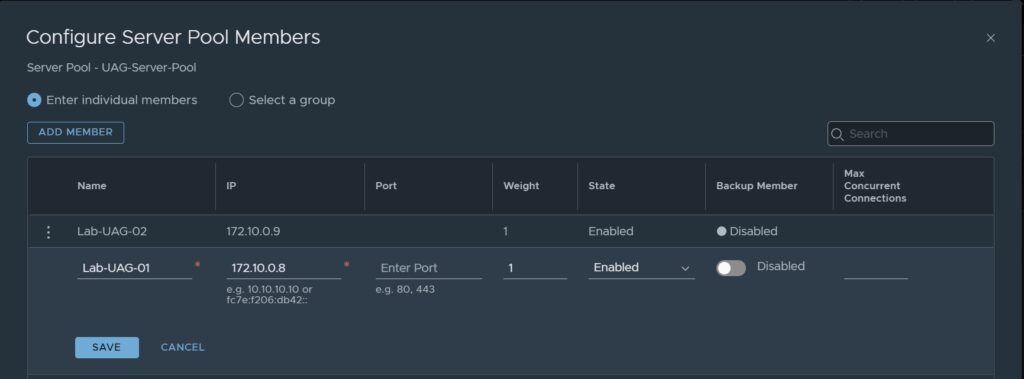
3. Create a Server Pool
A server pool consists of at least one or more servers that provide the same service or application. A server pool can be associated with both Layer 4 and Layer 7 virtual servers. In this step, we will add the two UAGs to the server pool.
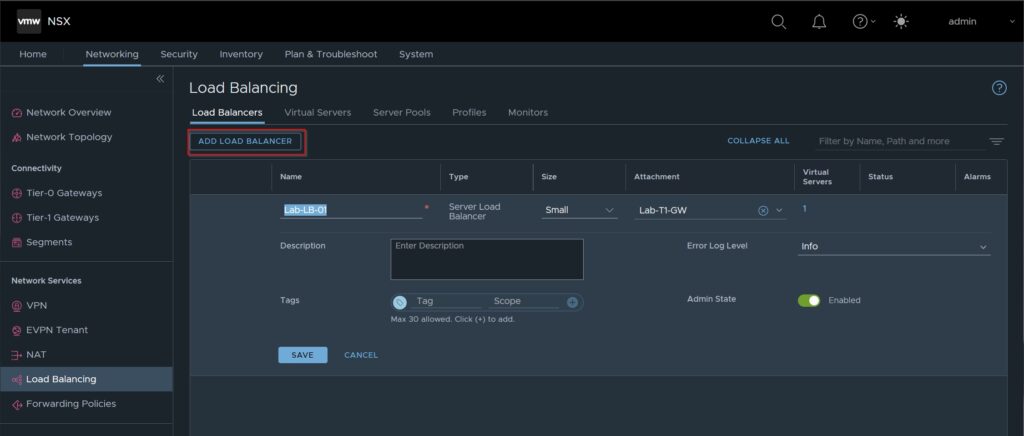
4. after all this preparation, we can finally create the actual load balancer. This is attached directly to the already existing Tier-1 Gateway.
5. in this last step we create the virtual server for the Unified Access Gateways. Virtual servers receive all connections from the clients and distribute them to the servers that are in the server pool. A virtual server has an IP address, a port, and a defined protocol. For layer 4 virtual servers a port range can be specified instead of a single TCP port or a UDP port to support complex protocols with dynamic ports.

So for now we are done & have successfully created our first Loadbalancer within NSX(-T).
If you have any questions or suggestions, feel free to contact me or use the comment function here under the post.
In further tutorials, I would like to show you in the future to expand my NSX-Environment to micro-segmentation with the goal of being able to provide a multi-tenant VDI environment.
So check back here from time to time or give me feedback on what you would like to see more tutorials.

No responses yet