Since AI (Artificial Intelligence) is so hot and I finally had some time over the holidays to work on it and even implement it in my Homelab, I’d like to share with you a quick look at what I did and how I achieved the goal of my chatbot.
As some followers of my blog may already know, I use various Nvidia graphics cards in my lab. For the AI use case, I used one of my Nvidia Tesla P4 cards and dedicated the entire 8GB of graphics memory to a virtual machine. I realized the whole thing in my lab using the already implemented Nvidia Grid (vGPU) technology, as this also makes it possible to pass the Cuda cores of the graphics card to the virtual machine. In an enterprise use case, one would certainly rely on the Nvidia Enterprise AI product for a VMware vSphere environment, as this changes the licensing of the graphics cards, the graphics memory is more scalable for individual VMs, etc. In addition, you get extensive access to the Nvidia AI framework and pre-trained models.
For my lab use case, however, I deliberately decided not to change my existing vGPU infrastructure and therefore used this and a freely accessible model from Meta.
However, after the quick introduction, let’s see how I implemented the whole thing:
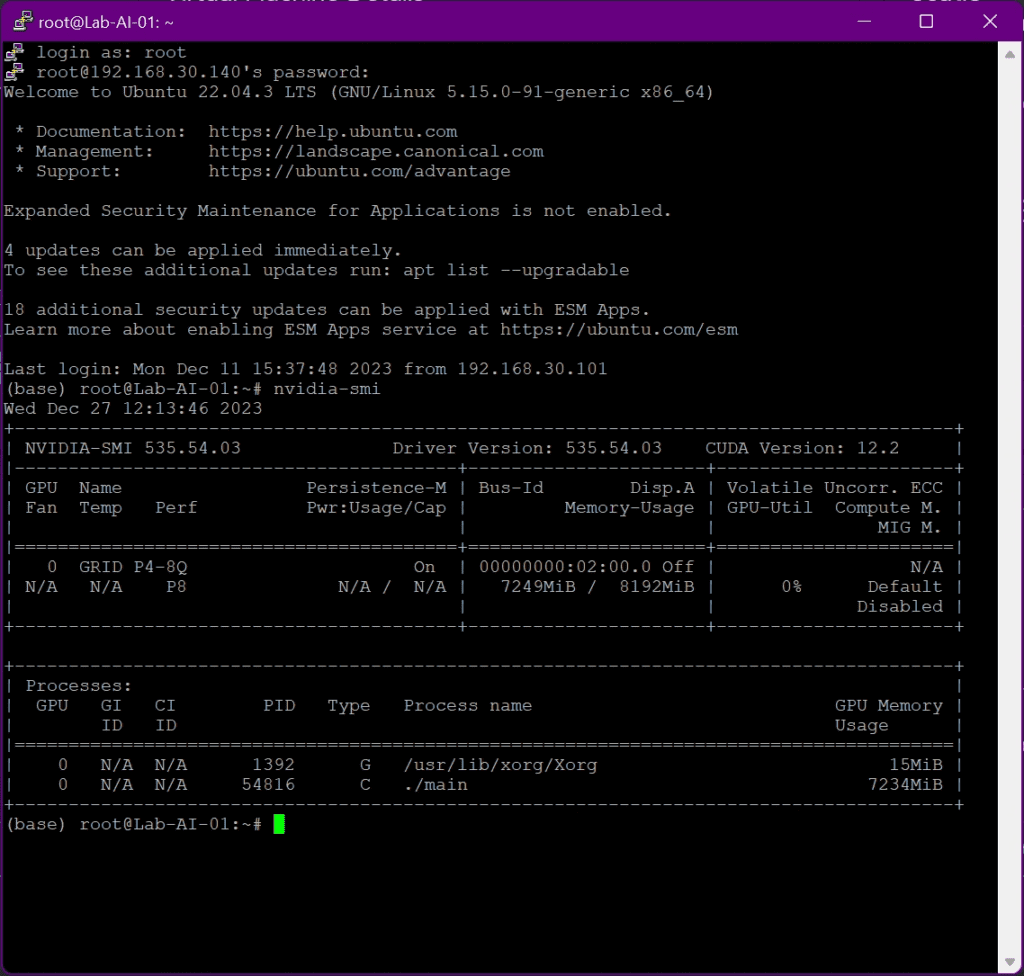
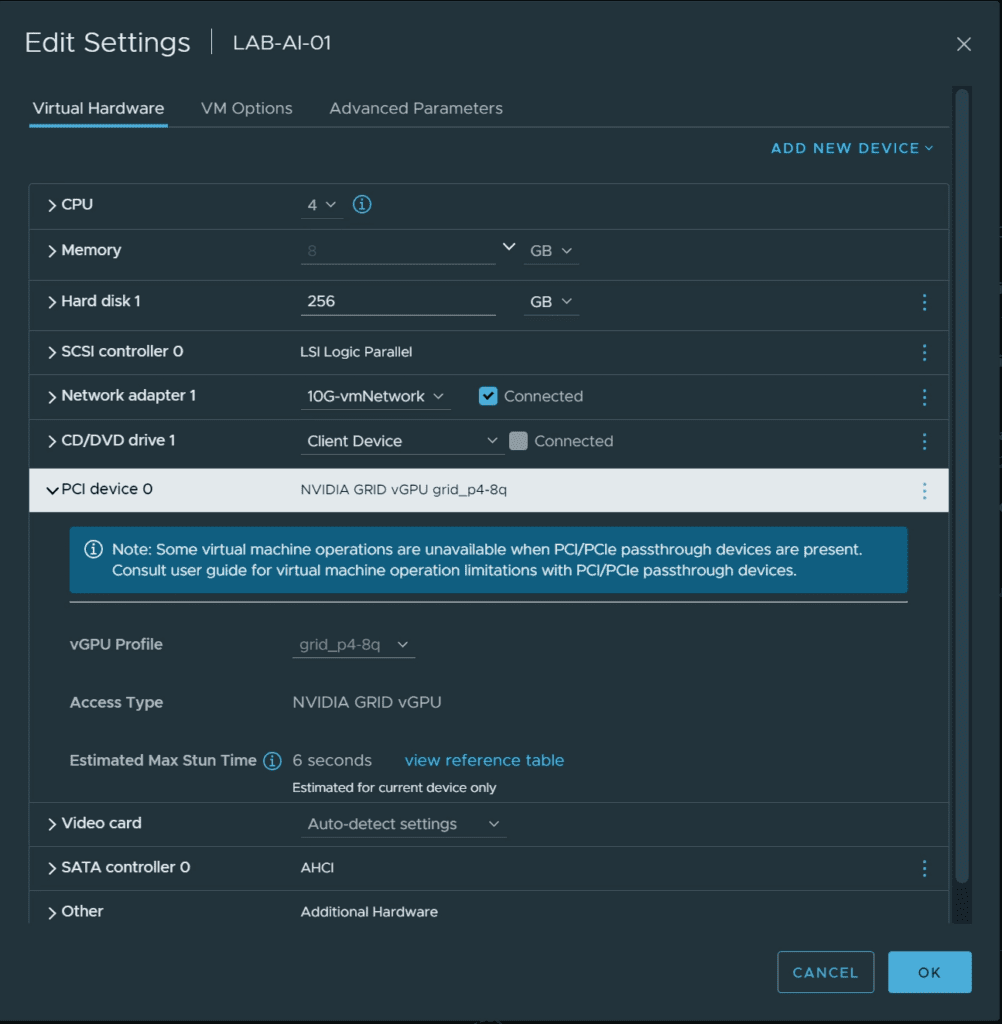
In the next step, I installed the Nvidia Cuda Toolkit and the Nvidia graphics drivers in my VM.
wget https://developer.download.nvidia.com/compute/cuda/repos/ubuntu2204/x86_64/cuda-ubuntu2204.pin
mv cuda-ubuntu2204.pin /etc/apt/preferences.d/cuda-repository-pin-600
wget https://developer.download.nvidia.com/compute/cuda/12.3.0/local_installers/cuda-repo-ubuntu2204-12-3-local_12.3.0-545.23.06-1_amd64.deb
dpkg -i cuda-repo-ubuntu2204-12-3-local_12.3.0-545.23.06-1_amd64.deb
cp /var/cuda-repo-ubuntu2204-12-3-local/cuda-200FE90D-keyring.gpg /usr/share/keyrings/
dpkg -i cuda-repo-ubuntu2204-12-3-local_12.3.0-545.23.06-1_amd64.deb
cp /var/cuda-repo-ubuntu2204-12-3-local/cuda-*-keyring.gpg /usr/share/keyrings/
apt-get update
apt-get -y install cuda-toolkit-12-3
apt-get install -y cuda-drivers
nvcc --version
nvidia-smi
reboot
Now that your „infrastructure“ is ready, you need to export the CUDA Home environment variable:
export CUDA_HOME=/usr/lib/cudaSince I will be using the open-source large language model Llama2 for my use case, this must of course also be downloaded within the VM:
git clone https://github.com/facebookresearch/llama.git
git clone https://github.com/ggerganov/llama.cpp.git
After cloning the Git repository, the download of the model must be activated via a request form, after you have received your individual download code via the form, you must change to the corresponding download directory execute the download script, and enter your individual key.
cd llama
./download.sh
Attention: you need about 160GB of free disk space within the VM if you want to download all Llama2 language models.
After downloading the model, I created a virtual environment for Phyton to rule out any compatibility problems. I realized the whole thing with Conda. If you would like more information, please have a look at the Deployment Guide.
mkdir -p ~/miniconda3
wget https://repo.anaconda.com/miniconda/Miniconda3-latest-Linux-x86_64.sh -O ~/miniconda3/miniconda.sh
bash ~/miniconda3/miniconda.sh -b -u -p ~/miniconda3
rm -rf ~/miniconda3/miniconda.sh

#After installing, initialize your newly-installed Miniconda. The following #commands initialize for bash and zsh shells:

~/miniconda3/bin/conda init bash
~/miniconda3/bin/conda init zsh
$ conda create -n llamacpp python=3.11
After installing the Miniconda environment it must be activated:
conda activate llamacppIn the next step, the source code of Llama2 must be compiled (with GPU support):
make clean && LLAMA_CUBLAS=1 CUDA_DOCKER_ARCH=all make -j
After the model is compiled it must be converted to „f16 format“ to be run on the GPU. In my shown examples I used the „7b-chat model“ and the 13b-chat model“:
mkdir models/7B
python3 convert.py --outfile models/7B/ggml-model-f16.gguf --outtype f16 ../llama/llama-2-7b-chat --vocab-dir ../llama/llama

mkdir models/13B
python3 convert.py --outfile models/13B/ggml-model-f16.gguf --outtype f16 ../llama/llama-2-13b-chat --vocab-dir ../llama/llama

mkdir models/70B
python3 convert.py --outfile models/70B/ggml-model-f16.gguf --outtype f16 ../llama/llama-2-70b-chat --vocab-dir ../llama/llama
When the conversion runs successfully, you can find the converted model in the corresponding folders:
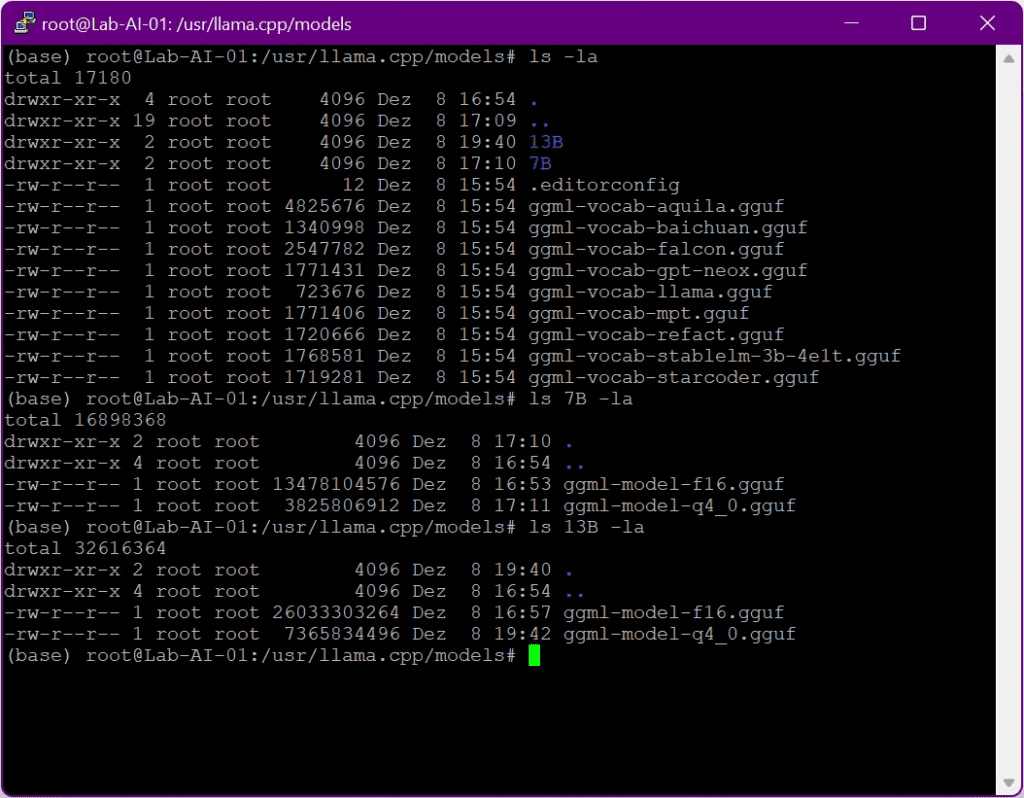
After the model is converted it must be quantized, in my case the model is quantized to 4-bits:
./quantize models/7B/ggml-model-f16.gguf models/7B/ggml-model-q4_0.gguf q4_0

./quantize models/13B/ggml-model-f16.gguf models/13B/ggml-model-q4_0.gguf q4_0
Now we are after all the preparation finally ready to open our chat prompt, this happens with the following command:
/usr/llama.cpp# ./main -m ./models/13B/ggml-model-q4_0.gguf -n 2048 --repeat_penalty 1.0 --color -i -r "User:" -f ./prompts/chat-with-bob.txt --n-gpu-layers 36and now our expected chat prompt based on the „13B-model“ with the use of 36 GPU layers opens up. Unfortunately, my GPU memory is not sufficient for more. Nevertheless, the whole thing works with acceptable performance and, above all, really useful answers. Below you can find some examples:
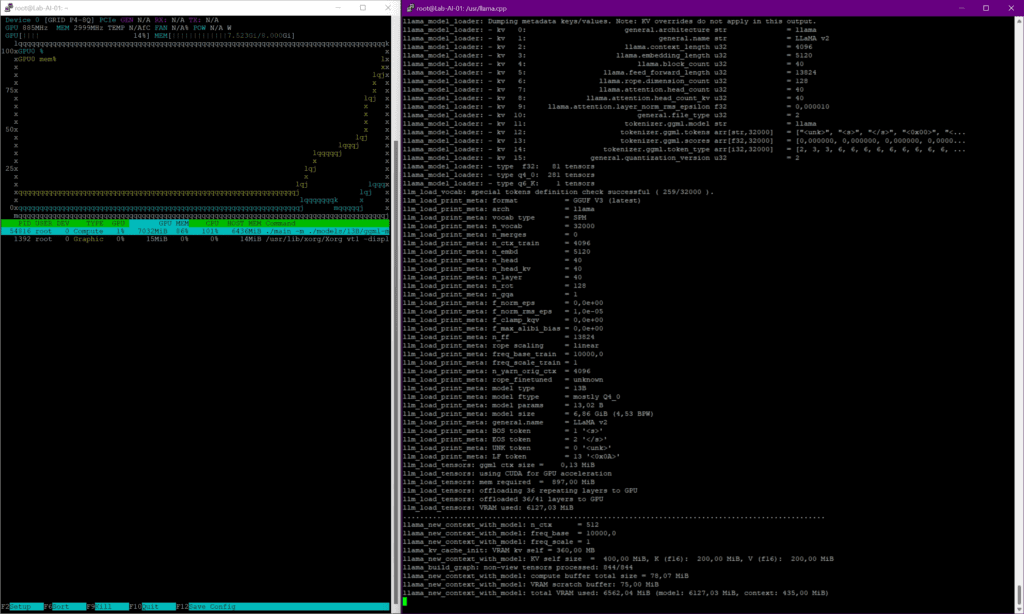
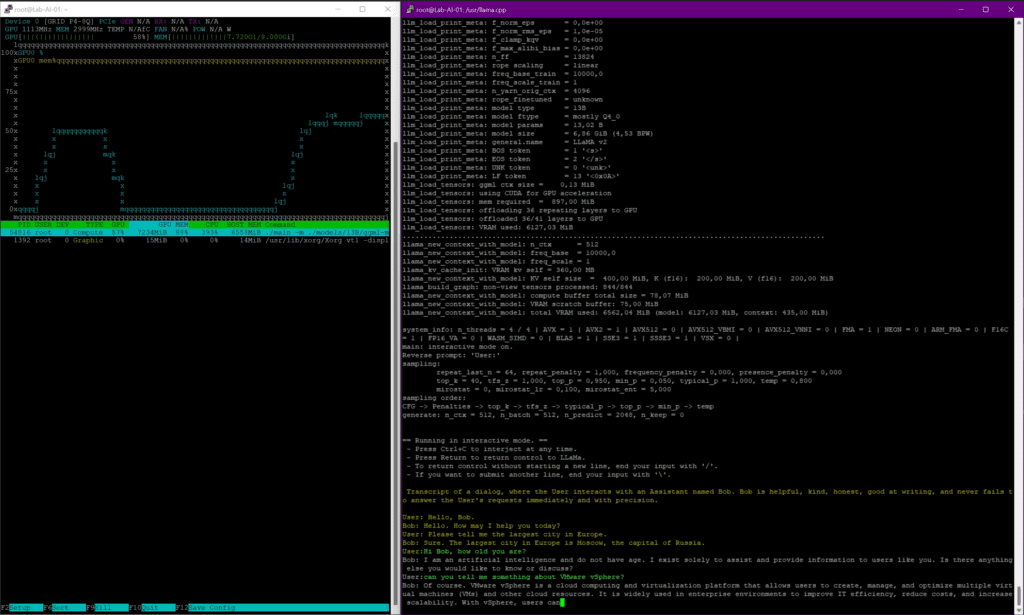
To give you a better overview of the chat behavior here is a little screen capture of a basic VMware topic:
For a small holiday project, isn’t that something to be proud of? In any case, I am more than satisfied with the result and have now also found my way into the world of AI. As always, if you would like more information or would like to exchange ideas, please write me a comment here or use the contact form here on my blog.
With this in mind, have a great holiday and a good start to 2024.
2 Responses
Can you incrementally train this model with new set of data like bugzilla data so that we can summarize the bug reports.
Can this also work on cpu only VMs. Even if we have to wait for 15 mins for the inference to be given by the model with CPU only VMs , it will be useful.
Hi Manuel.
Would you like to be our guest at the VMware CMTY Podcast?
Please feel free to reach out to julia.klaus@broadcom.com
Best,